What is Docker Build Cloud?
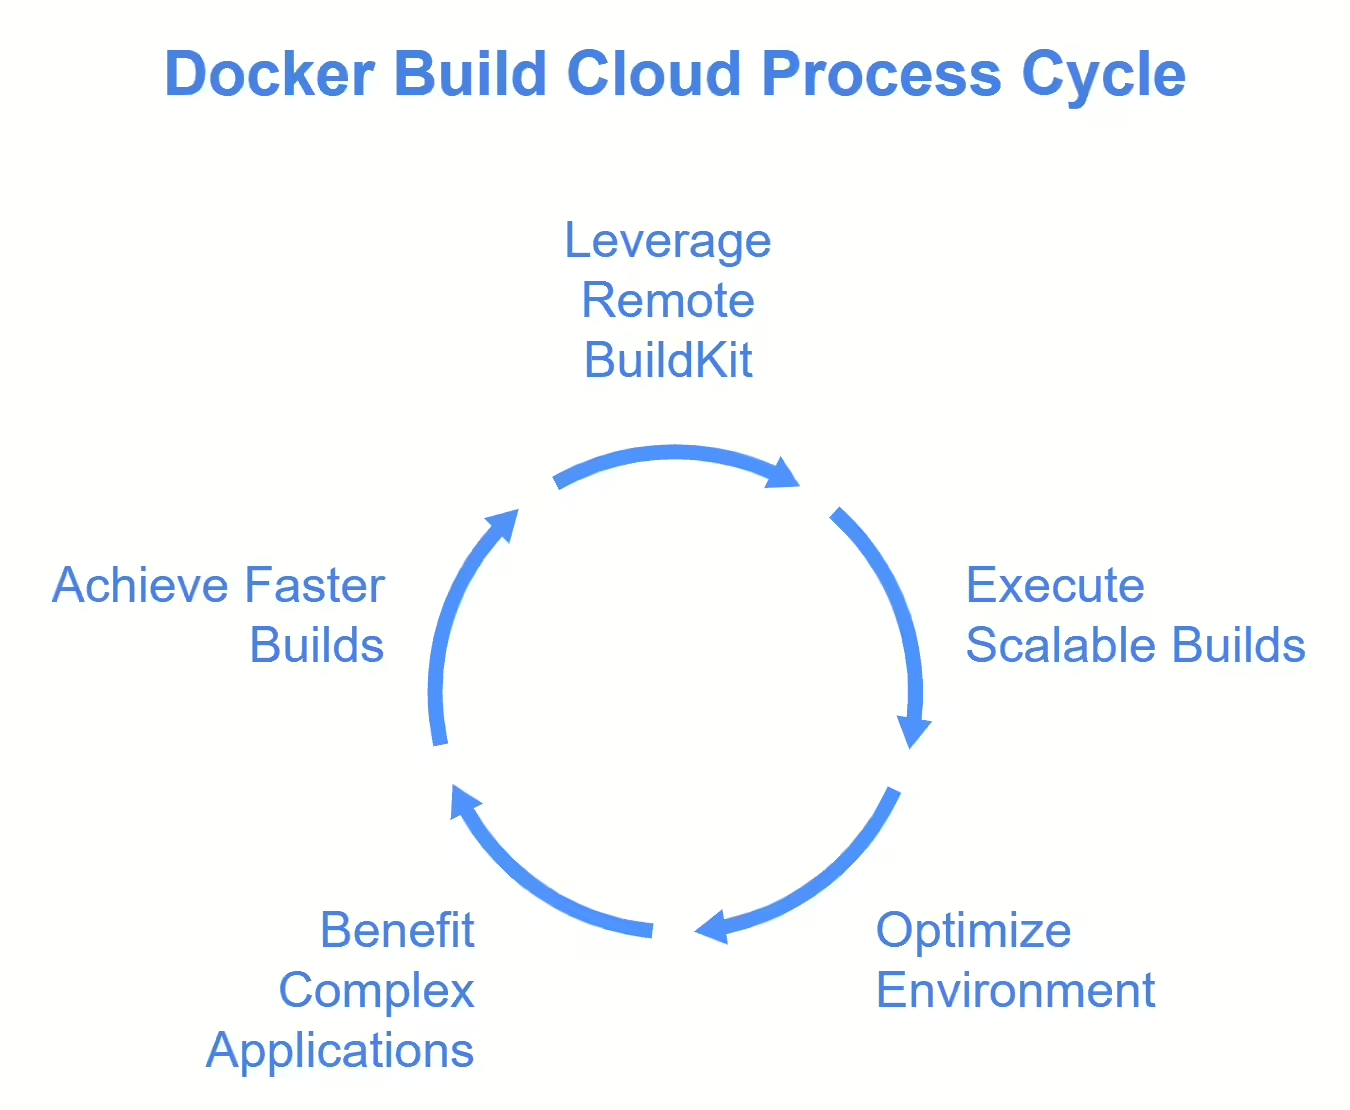
Docker Build Cloud is a cloud-based service designed to enhance the efficiency of building container images. It leverages remote BuildKit instances, allowing developers to execute builds in a scalable and optimized environment. This service is particularly beneficial for teams working on complex applications that require multi-platform builds, as it provides a shared cache and improved build speeds—reportedly up to 39 times faster than traditional local builds Docker Build Cloud: Reclaim your time with fast, multi-architecture builds.

Benefits of Using Docker Build Cloud
-
Improved Performance: By utilizing cloud resources, Docker Build Cloud significantly reduces build times, helping developers focus more on coding rather than waiting for builds to complete.
-
Resource Efficiency: Offloading builds to the cloud alleviates the burden on local machines, freeing up CPU and memory resources for other tasks. This is especially advantageous for developers working on resource-intensive applications.
-
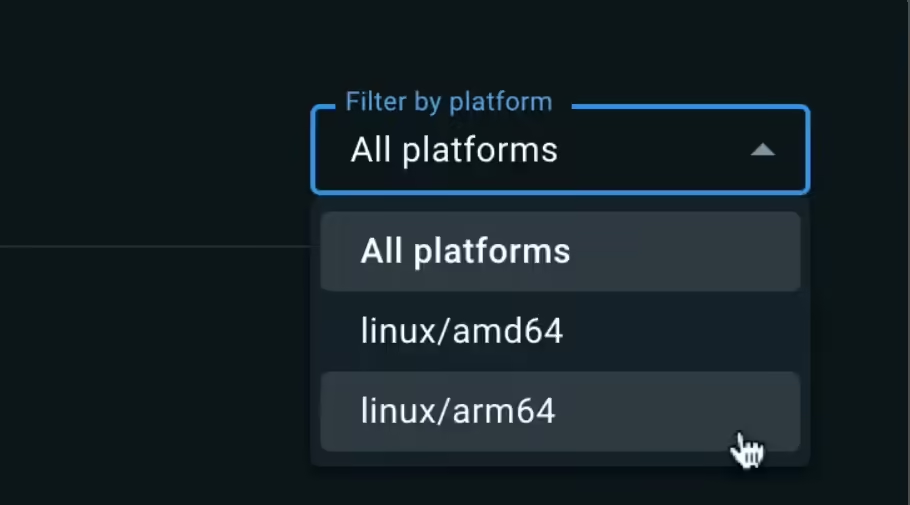
Multi-Platform Support: Docker Build Cloud supports building images for multiple architectures seamlessly, making it easier to develop applications that run across different environments without complex setups. It provides native support for
linux/amd64andlinux/arm64architectures. -
Shared Build Cache: The service employs a shared cache mechanism, allowing teams to reuse previously built layers. This not only speeds up subsequent builds but also enhances collaboration among team members by ensuring consistency in build outputs.
-
Simplified CI Integration: Docker Build Cloud can be easily integrated into various CI platforms, including GitHub Actions, CircleCI, Jenkins, and others, speeding up build pipelines and reducing context switching.
This tutorial explains how to set up Docker Build Cloud and integrate it into your local development process.
Prerequisites
Before starting, ensure you meet the following requirements:
-
A Docker account with a Docker Build Cloud subscription. You can sign up for a Docker Build Cloud subscription in the Docker Build Cloud Dashboard
-
Docker Desktop version 4.26.0 or later installed on your machine. If you haven't set it up yet, follow Docker's official installation guide
-
If you plan to use Docker Build Cloud without Docker Desktop:
-
Download and install a version of Buildx with support for Docker Build Cloud (the
clouddriver) from this repository. -
If you plan on using
docker compose build, you'll also need a compatible version of Docker Compose from this repository
-
Step 1: Sign in to Docker and Set Up Docker Build Cloud
To use Docker Build Cloud, you need to authenticate with Docker and set up the cloud builder.
-
If you're using Docker Desktop, sign in to your Docker account from the Docker Desktop menu:
- Select Sign in / Create Docker ID from the Docker Desktop menu and follow the on-screen instructions to complete the sign-in process
-
If you're using a standalone version of Docker Engine, open a terminal and log in to Docker using the
docker logincommand:docker loginEnter your Docker Hub username and password when prompted.
-
Add the cloud builder endpoint. Replace
<ORG>with the Docker Hub namespace of your Docker organization and<BUILDER_NAME>with your desired builder name:docker buildx create --driver cloud <ORG>/<BUILDER_NAME>This creates a builder named
cloud-ORG-BUILDER_NAME. -
Verify the setup by running:
docker buildx lsLook for your newly created cloud builder in the list.
Step 2: Configure Docker Build Cloud for Local Development
To set up Docker Build Cloud for local development, you need to configure your local environment to use the cloud builder:
-
Set the cloud builder as the default builder:
docker buildx use cloud-<ORG>-<BUILDER_NAME>Replace
<ORG>and<BUILDER_NAME>with the values you used when creating the cloud builder in Step 1. -
Verify that the cloud builder is set as the default:
docker buildx lsYou should see an asterisk (*) next to your cloud builder, indicating it's the default.
-
To enable Docker Build Cloud for
docker buildcommands, set the following environment variable:export DOCKER_BUILDKIT=1This enables BuildKit, which is required for Docker Build Cloud.
-
(Optional) If you want to use Docker Build Cloud with Docker Compose, add the following to your
docker-compose.ymlfile:x-bake: docker-buildx: driver: cloudThis configuration tells Docker Compose to use the cloud driver for builds
Step 3: Prepare Your Dockerfile for Docker Build Cloud
Ensure that your project directory includes a properly configured Dockerfile. The Dockerfile defines how your application is built.
Example Dockerfile:
# syntax=docker/dockerfile:1

# Use an official Node.js runtime as the base image
FROM node:18-alpine

# Set the working directory inside the container
WORKDIR /app

# Copy package.json and package-lock.json (if available)
COPY package*.json ./

# Install dependencies
RUN --mount=type=cache,target=/root/.npm \
    npm ci --only=production

# Copy the application code
COPY . .

# Expose the application on port 3000
EXPOSE 3000

# Start the application
CMD ["npm", "start"]
Place this file in the root of your project directory.
Step 4: Use Docker Build Cloud for Local Builds
To use Docker Build Cloud for your local builds:
-
Ensure you've completed the setup from Step 2, where you configured the cloud builder.
-
To build an image using Docker Build Cloud, use the
docker buildx buildcommand:docker buildx build --tag <IMAGE_NAME>:<TAG> .Replace
<IMAGE_NAME>and<TAG>with your desired image name and tag. -
If you want to build for multiple platforms, use the
--platformflag:docker buildx build --platform linux/amd64,linux/arm64 --tag <IMAGE_NAME>:<TAG> .This will build your image for both AMD64 and ARM64 architectures.
-
To push the built image to a registry, add the
--pushflag:docker buildx build --platform linux/amd64,linux/arm64 --tag <IMAGE_NAME>:<TAG> --push . -
If you're using Docker Compose, you can build your services using Docker Build Cloud with:
docker compose build
Step 5: Build and Push a Local Image
For testing purposes, you can build and push a local image manually.
-
Build the image using the following command, replacing
<repository-name>with your Docker Hub repository name:docker build -t <your-username>/<repository-name>:latest . -
Push the image to Docker Hub:
docker push <your-username>/<repository-name>:latest -
Verify that the image appears in your Docker Hub repository.
Step 5: Build and Push an Image Using Docker Build Cloud
When using Docker Build Cloud for local development, you can build and push images directly to a registry.
-
Build and push the image.
docker buildx build --push --tag <your-username>/<repository-name>:latest .This command builds the image using Docker Build Cloud and pushes it to the specified registry (Docker Hub by default).
-
For multi-platform builds, add the
--platformflag:docker buildx build --platform linux/amd64,linux/arm64 --push --tag <your-username>/<repository-name>:latest .This builds the image for both AMD64 and ARM64 architectures.
-
If you want to build without pushing, you can use the
--loadflag instead of--push:docker buildx build --load --tag <your-username>/<repository-name>:latest .This loads the built image into your local Docker image store. Note that
--loaddoesn't work with multi-platform builds. -
To verify the build, you can inspect the image:
docker buildx imagetools inspect <your-username>/<repository-name>:latestThis command shows details about the built image, including its architecture and layer.
-
You can view build information, including ongoing and completed builds, in the Docker Desktop Builds view.
Step 6: Test the Image Built with Docker Build Cloud
After building your image with Docker Build Cloud, you can test it locally.
-
If you used the
--pushflag when building, pull the image:docker pull <your-username>/<repository-name>:latest -
For multi-platform images, specify the platform when running:
docker run --platform linux/amd64 -d -p 3000:3000 <your-username>/<repository-name>:latestReplace
linux/amd64with your target platform if different. -
Access your application in a browser at
http://localhost:3000. -
To verify the image details, use:
docker inspect <your-username>/<repository-name>:latest -
For multi-architecture images, you can use:
docker buildx imagetools inspect <your-username>/<repository-name>:latestThis command shows details about all architectures in the multi-platform image..
-
To stop the container when you're done testing:
docker stop $(docker ps -q --filter ancestor=<your-username>/<repository-name>:latest)
Step 7: Optimize Your Local Development Workflow with Docker Build Cloud
When using Docker Build Cloud for local development, you can optimize your workflow.
-
Use the shared build cache to speed up builds:
Docker Build Cloud provides a shared build cache that can significantly speed up builds across your team. To use it effectively, structure your Dockerfile to maximize cache hits.
For example, in your Dockerfile:
# Copy only package files first COPY package*.json ./ # Install dependencies with caching RUN --mount=type=cache,target=/root/.npm \ npm ci # Copy the rest of the application code COPY . . -
Leverage multi-platform builds:
Docker Build Cloud supports building for multiple platforms simultaneously. Use this feature to ensure your application works across different architectures:
docker buildx build --platform linux/amd64,linux/arm64 --tag <your-username>/<repository-name>:latest . -
Use Docker Compose with Build Cloud:
If your project uses Docker Compose, you can configure it to use Docker Build Cloud:
# In docker-compose.yml
x-bake:
  docker-buildx:
    driver: cloud
Then build your services with:
docker compose build
Step 8: Monitor Builds and Logs with Docker Build Cloud
Docker Build Cloud provides tools for monitoring builds and accessing logs directly from your local environment:
-
Use Docker Desktop's Builds view:

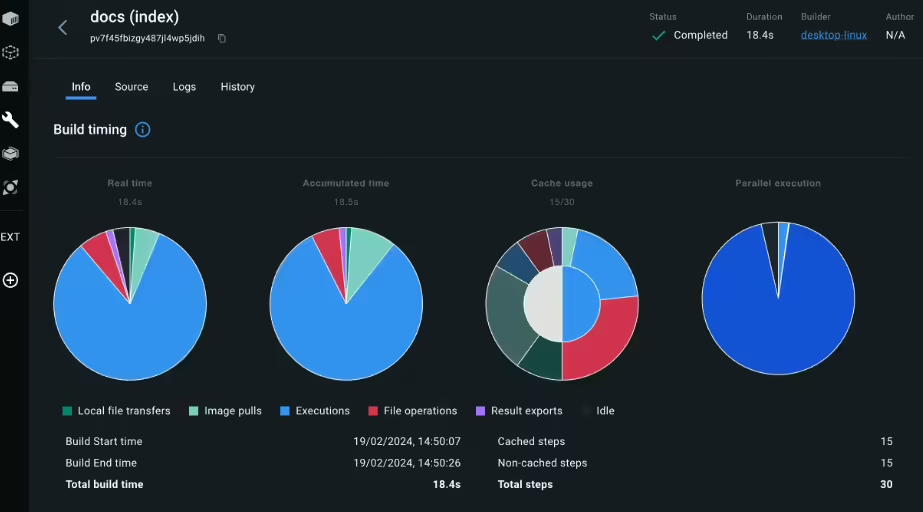
Docker Desktop includes a Builds view that works with Docker Build Cloud out of the box. This view shows information about your builds and those initiated by your team members using the same builder.
-
Inspect builds:
To inspect a specific build, select it in the Builds view. You can access various tabs with detailed information:

- The Info tab displays build details, including timing breakdowns and configuration.
- The Dependencies tab shows images and remote resources used during the build.
- The Source tab (or Error tab for failed builds) displays the Dockerfile source and any error messages Desktop > Use-desktop > Explore the Builds view in Docker Desktop > Inspect builds.
-
View build logs:

The Logs tab in the inspection view displays build logs. For active builds, these logs are updated in real-time. You can toggle between a List view and a Plain-text view of the build log Desktop > Use-desktop > Explore the Builds view in Docker Desktop > Inspect builds > Build logs.
-
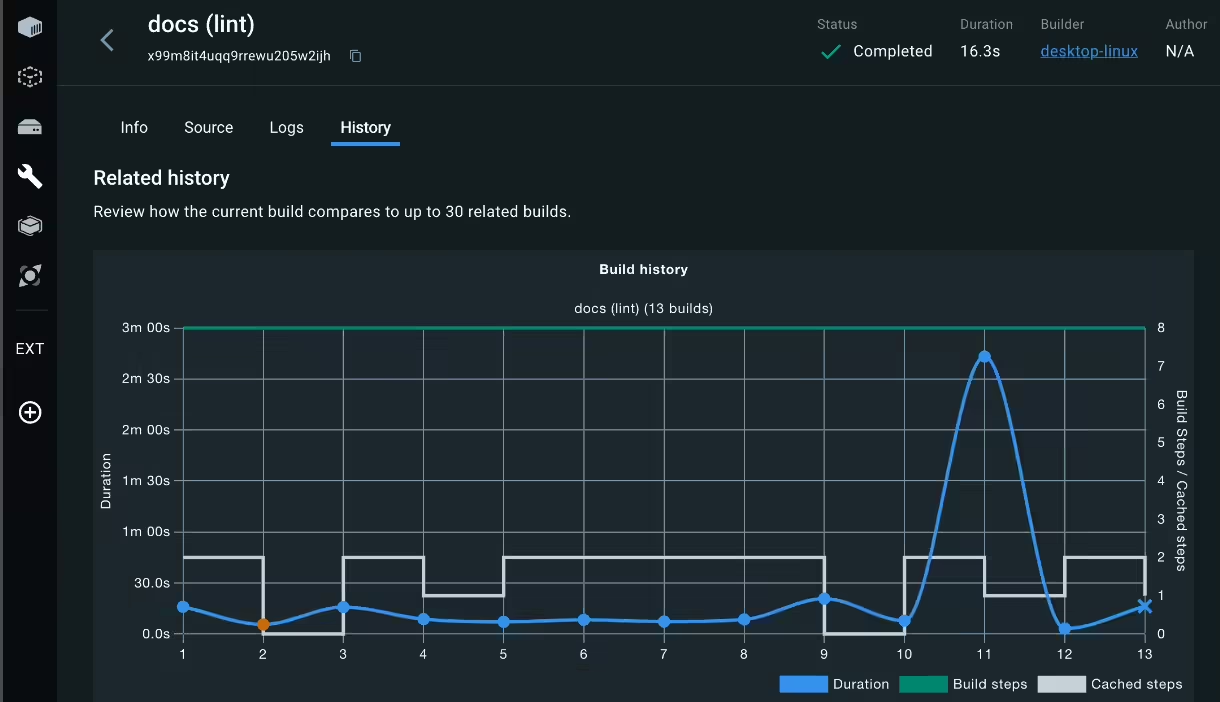
Analyze build history:
The History tab shows statistics about completed builds, including trends in duration, build steps, and cache usage Desktop > Use-desktop > Explore the Builds view in Docker Desktop > Inspect builds > Build history.
-
Use CLI for build information:
If you prefer using the command line, you can get build information using:docker buildx build --progress=plain .This command shows detailed build progress.
Step 9: Manage Resources and Clean Up
Periodically, clean up and manage your build cache:
-
List all Docker images:
docker images -
Remove unused images:
docker image prune -aThe
-aflag removes all unused images, not just dangling ones. -
Clean up the Docker Build Cloud cache:
Docker Build Cloud manages its cache automatically through garbage collection. Old cache is automatically removed if you hit your storage limit.
-
Check your current cache state:
docker buildx duThis command shows details about your current build cache usage.
-
To manually clear the builder's cache:
docker buildx pruneBe cautious when using this command as it affects the cache for all team members using the same builder.
-
For a more comprehensive cleanup, use:
docker system prune -a --volumesThis command removes all unused containers, networks, images (both dangling and unreferenced), and volumes
Conclusion
You have successfully set up and integrated Docker Build Cloud into your local development process. By offloading builds to the cloud, you’ve streamlined your workflow, saving local resources while ensuring consistent and automated container builds. For advanced configurations, refer to the official Docker Build Cloud documentation.
