Have you just started using Docker and are unsure of all its features? We noticed that questions about how to create Docker container backups frequently appear on forums. To address this, we compiled all the necessary information in this article. We present a clear, step-by-step guide to help you find solutions. This guide equips you with the knowledge to perform backups confidently and guarantees that your Docker containers remain secure and recoverable.
Why Should You Consider Docker Container Backup?
Docker has revolutionized the development and deployment process. It places applications in self-sufficient containers that guarantee consistency across multiple environments. For DevOps, Docker is indispensable. It supports swift development, testing, and deployment aligned with modern agile practices. The technology makes configurations easier and also improves scalability.
According to a recent Handy Recovery Advisor report on backup practices, only 33% of individuals surveyed consistently perform data backups. If you utilize Docker in your operations, you must join this minority—here’s why.

- Docker containers often hold critical data such as database entries, user details, and application settings. When you back up this data, it protects against loss, corruption, or unauthorized access.
- Docker container backup facilitates rapid recovery from disasters such as server crashes or data center failures. With backups, you can quickly restore data and applications.
- Regular backups of Docker containers enable easy version control management for your applications. If updates cause issues, you can effortlessly revert to earlier versions of your containers.
- Backups allow you to replicate specific states of your applications and data, which is important for testing or debugging.
Prepare for Backup: What are Docker Containers, Images, and Volumes
Now that we have explained the need to create a backup when working with Docker, let’s examine its main elements: the container, image, and volume.
- Docker Containers are lightweight, executable packages that contain everything needed to run an application—the code, a runtime, libraries, environment variables, and configuration files. Containers isolate software from its environment and guarantee that it works uniformly despite differences between development and staging.
- Docker Images are static files that act as templates for creating containers. They contain the source code, libraries, dependencies, tools, and other files needed for an application to run. When you launch a container, Docker uses the image as the blueprint. Images are immutable, which means they do not change once you create them. You build images from a Dockerfile that specifies exactly what the image contains.
- Docker Volumes provide persistent storage for a Docker container. They are necessary because, by default, all changes to a container’s file system disappear when you delete the container. Volumes solve this problem and store data in a part of the host file system that Docker manages. This setup allows data to persist independently of the container’s life cycle, facilitates data sharing between multiple containers, and aids in data backup and recovery processes.
Note: Since Docker images are static and do not change once created, our attention will shift primarily to how to create backups of the containers and volumes themselves. Containers and volumes, unlike images, contain dynamic data and state information that can change frequently and are important for the running state of your applications.
How to Backup Docker Data
In the sections below, we will show you how to easily backup the Docker data you need with its commands. This solution will prove convenient if you already have experience working with Docker. If not, follow our instructions closely and adhere to the specified syntax, and everything will work.
Note: If you have additional questions or want to share your opinion or advice with others, you can leave a message on Handy Recovery Advisor’s discussion board or other forums where data backup is discussed. This engagement can provide further information and practical tips from the Docker community.
1. Backup Docker Container
You must back up a Docker container, an important step in managing your Docker environment. This process guarantees that you preserve the operational state of your applications and can recover them quickly if necessary.
Before you begin, keep the following points in mind:
- Use the following docker ps command to locate the container ID of the container you plan to back up.
- View available export options by running docker export –help.
- If you wish to export the container named or identified as cf0f27124fb5, enter:
docker export cf0f27124fb5 > backup.tar - Keep in mind that the backup process may take longer for larger containers and runs in the background by default.
- If you want to monitor the progress in real time, install the pv tool and run:
docker export cf0f27124fb5 | pv > backup.tar- For Ubuntu/Debian: sudo apt install pv
- For CentOS/RHEL: sudo yum install pv
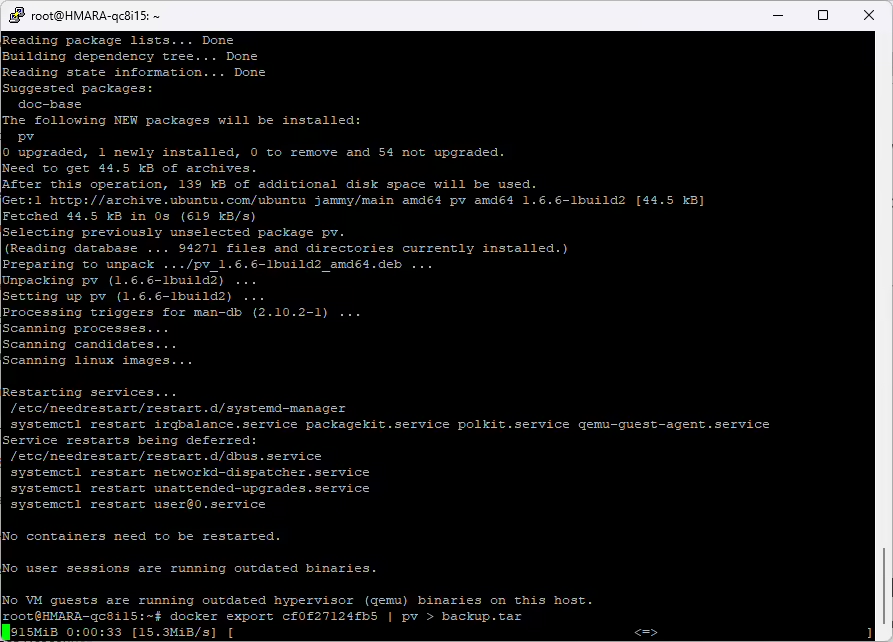
- To begin, you need to export the entire container to a tar file. This captures the current state of the container’s file system:
$ docker export [OPTIONS] CONTAINER > backup.tar
Explanation of commands: docker export – this command prepares the container’s file system for export; [OPTIONS] – replace this with any applicable options for the export command; CONTAINER – specify the container ID or name you wish to backup; > backup.tar – Directs the output into a tar file named backup.tar.
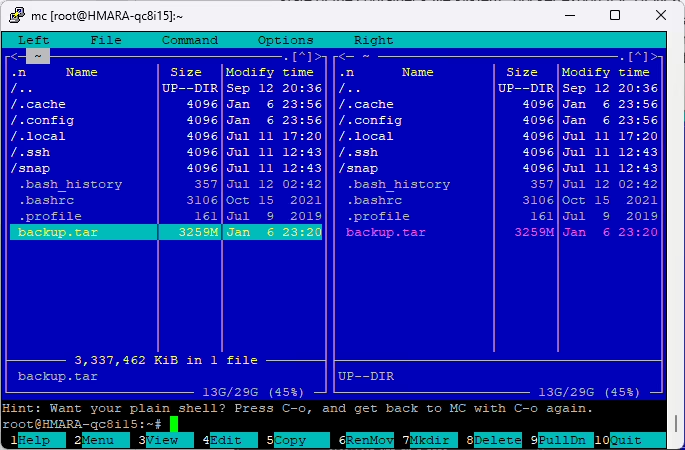
Then, verify that the tar file contains all the required data and has no errors: tar -tvf backup.tar.
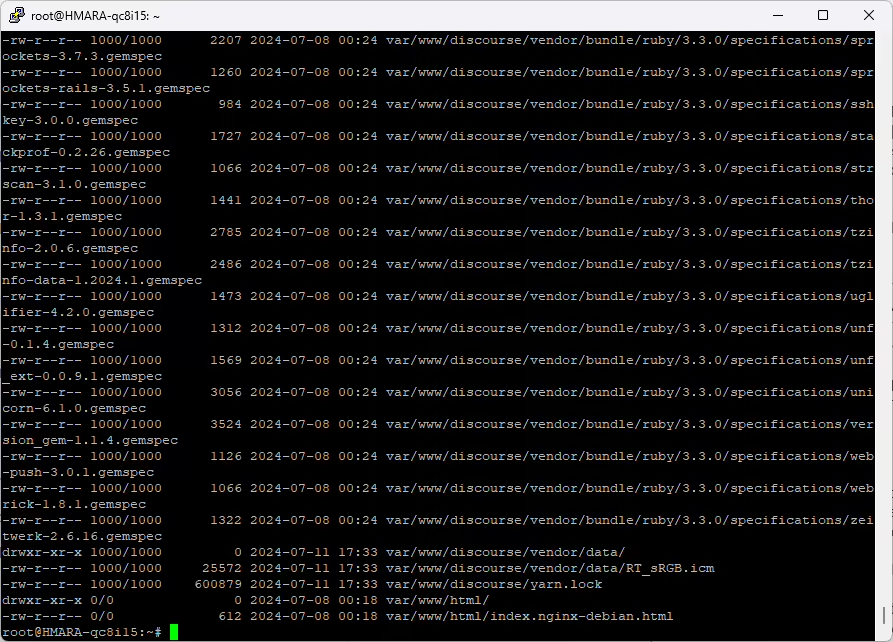
Explanation of commands: tar -tvf – lists the contents of the tar file to provide completeness and integrity; backup.tar – the name of the file you created in the previous step.
- Connect your external storage device to your computer, copy the backup.tar file directly to the device with your operating system’s file manager, and safely eject the device after the transfer completes.
- Log into your cloud storage provider’s interface and use the upload function to select and upload the backup.tar file from your local system. Confirm that the upload is complete before logging out.
2. Backup Docker Volume
Also, you should backup Docker volumes to provide the persistence of data containers modified or generated during operation.
- If the container uses a Docker volume, you also need to preserve that data (see instructions below).
- Check which storages are attached to your container by running: docker inspect <container_name_or_id>
- In the Mounts section, look for Type: bind or Type: volume. If you do not see any volumes, you can skip this step.
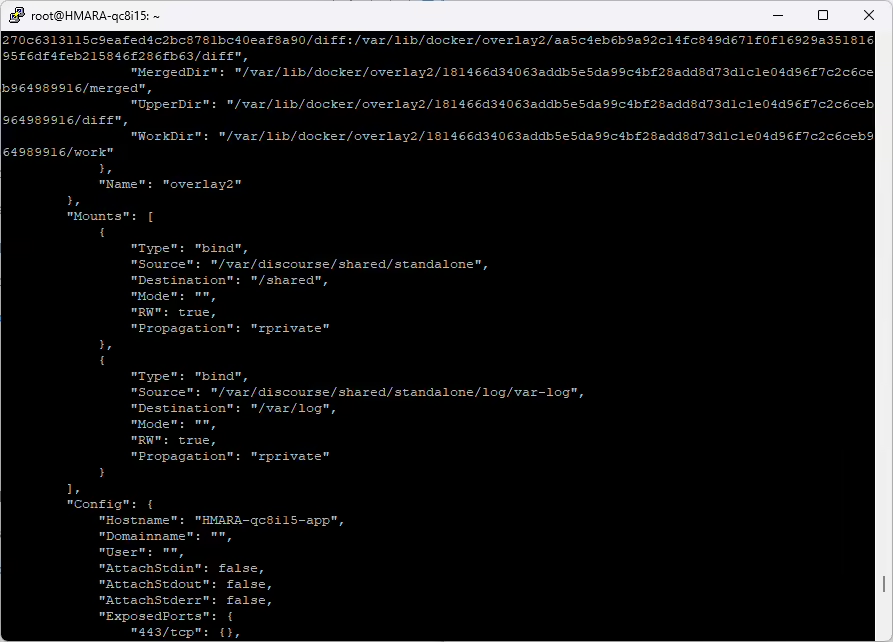
Docker volumes are designed to preserve data independent of the containers’ lifecycles, which makes them necessary for non-temporary data needs.
- Before you start the backup process, you need to identify the Docker volume you want to back up. The command docker volume Is lists all volumes managed by Docker.
- To backup the volume, you will use the docker run command to create a new container that mounts the volume and then saves its contents to a tar file: docker run –rm -v [volume-name]:/data -v $(pwd):/backup ubuntu tar cvf /backup/[backup-file-name].tar /data
Explanation of commands: docker run –rm – runs a temporary container and removes it after the command executes; -v [volume-name]:/data – mounts the volume to be backed up to the /data directory in the container; -v $(pwd):/backup – Mounts the current working directory to the /backup directory in the container; ubuntu tar cvf /backup/[backup-file-name].tar /data – uses the Ubuntu image to execute the tar command, compressing the contents of /data into a tar file located in /backup.
- After you create the tar file, you should verify that the file contains all the required data. Type the command: tar -tvf [backup-file-name].tar.
- To secure the backup files, revert to the method outlined in the previous section and use steps 3-4 to transfer data to external or cloud storage.
3. Bonus: Save Data with Docker Commit
You must back up Docker volumes and containers to maintain data integrity and operational continuity. However, another method to preserve Docker data uses the docker commit command. This method differs from standard volume and container backups because it captures a container’s current state and saves it as a new image. This technique proves valuable when you need to capture a container’s exact state at a specific point in time, such as after a critical update or modification.
- First, identify the container you wish to commit. With the docker ps command, you can list all running containers to find the specific one.
- Use the docker commit [options] container [repository[:tag]] to create a new image from the container’s current state.
docker commit cf0f27124fb5 backup_image
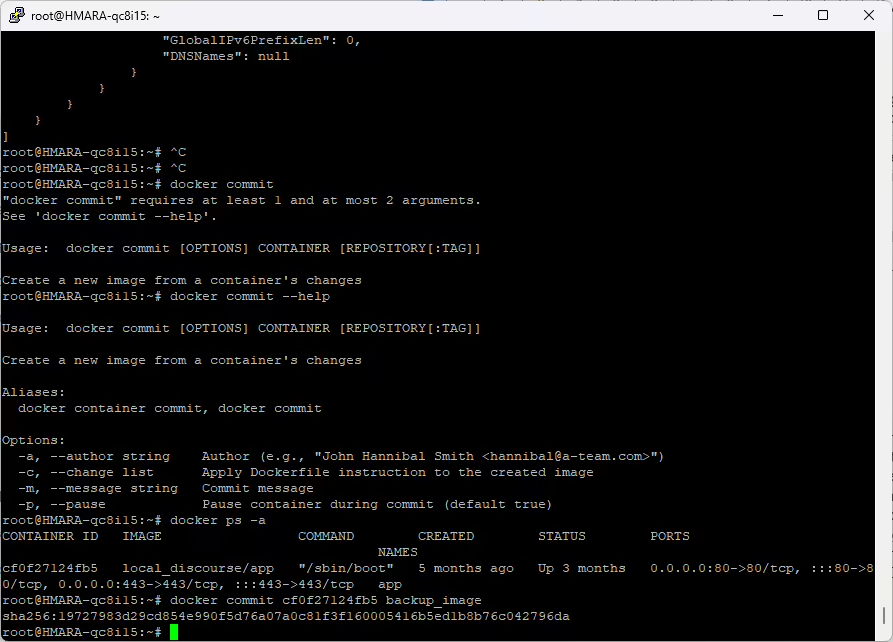
Explanation of commands: docker commit – creates a new image from a container’s changes; [options] – optional flags for the commit command; container – specify the container ID or name; repository[:tag] – name the new image and optionally tag it for version control.
3. After you commit the container to a new image, check that the image exists and is correctly tagged. Use the docker images command. It lists all Docker images on the host and allows you to confirm the presence and tag of your new image.
4. After verifying the new image, you can save it to an external storage device, but first, save it as a tar file and then transfer it to your external storage. Command to save as a tar file: docker save -o [path/to/your-image.tar] [repository[:tag]].
5. For cloud storage, upload the tar file with your cloud provider’s upload tools, but firstly use the command docker save [repository[:tag]] | gzip > [path/to/your-image.tar.gz]. It compresses your file into a smaller file size and prepares a Docker image for upload to cloud storage.
Note: You may have noticed that at the end of each Docker data backup method, we included steps to save additional copies of Docker files on other devices or cloud storage. Why is this practice critical? This action is important because, according to a Handy Recovery Advisor report, about 50% of people do not use physical backups, which increases their data vulnerability to cyberattacks and leaks. Verify that you have a Docker backup in the cloud and on an external device so that if one becomes compromised, you have another safe, accessible copy. This dual-layer strategy greatly improves the security and reliability of your Docker data.
How to Restore Docker Backups
Now that you understand how to backup all the critical elements in Docker, you may be wondering how to restore them from the backup.
To restore a Docker container from a previously saved image, here are the sequential steps to provide accurate recovery:
- Firstly, load the Docker image from the tar archive file you saved during the backup process with the command: docker load -i [path/to/your-image.tar]
- Then, check that it is correctly listed in your Docker environment. Type docker images to list all Docker images on the host, allowing you to confirm the presence of the newly loaded image.
- With the image verified, proceed to create and start a new container with this image: docker run -d –name [new-container-name] [image-name].
Explanation of commands: docker run – starts a new container; -d – detaches the container, allowing it to run in the background; –name [new-container-name] – ss signs a new name to the container, which you can specify; [image-name] – the name of the image you just loaded, which will be used to create the new container.
If you have backed up Docker volumes, here are the steps to restore them:
- Verify you have a Docker volume ready to receive the data and create a new Docker volume: docker volume create [new-volume-name].
- Restore the data to this volume by running a container that mounts it and extracts it into it: docker run –rm -v [new-volume-name]:/target -v $(pwd):/backup busybox tar xvf /backup/[backup-file-name].tar -C /target.
Explanation of commands: docker run – runs a temporary container; –rm – automatically removes the container when it exits; -v [new-volume-name]:/target – mounts the new volume at /target inside the container; -v $(pwd):/backup – mounts the current directory to /backup inside the container; busybox tar xvf /backup/[backup-file-name].tar -C /target – uses the BusyBox image to extract the tar file contents into the mounted volume.
Wrapping Up
In this article, we covered the main steps to backup and restore Docker containers and volumes. We provided detailed instructions and explained commands. We aimed to give you all the necessary information to handle Docker data confidently. However, every Docker setup might have its own specific needs and issues. If you require more personalized advice or further information, you should join discussions on the Handy Recovery Advisor’s discussion board or other similar forums. There, you can connect with experienced users who can offer practical ideas and solutions based on their experiences.
FAQ
How often should I backup my Docker containers?
The frequency of backups for Docker containers depends on how frequently the data within those containers changes. Consider daily backups if you frequently deploy new versions or have dynamic data that changes often. Weekly or bi-weekly backups might suffice for less critical applications where data changes less regularly. Assess your data’s criticality and usage patterns for an appropriate backup schedule.
Can I automate the backup process for Docker containers?
You can automate the backup process for Docker containers. Several tools and scripts enable automation, such as Docker’s command-line interface (CLI) with cron jobs on Linux or Task Scheduler on Windows. You can also use third-party tools like Portainer, Bacula, or Docker-specific plugins that integrate with continuous integration and continuous deployment (CI/CD) workflows to manage and automate backups.
Can I backup Docker containers while they are running?
You can backup Docker containers while they are running. The docker commit command creates a snapshot of a running container at any point in time. This command converts the container’s current state into a new image, which you can then save and use as a backup. This method allows for active backups without needing to stop the container, minimizing downtime. However, for consistency in data-intensive applications, consider additional strategies, like using Docker volumes that can be backed up independently while provideing data integrity.
