2 week back, I wrote a blog post on how Developers can now build ARM containers on Docker Desktop using docker buildx CLI Plugin. Usually developers are restricted to build Arm-based application right on top of Arm-based system.Using this plugin, developers can build their application for Arm platform right on their laptop(x86) and then deploy onto the Cloud flawlessly without any cross-compilation pain anymore.
Wait…Did you say “ARM containers on Cloud?”
Yes, you heard it right. It is possible to deploy Arm containers on Cloud. Thanks to new Amazon EC2 A1 instances powered by custom AWS Graviton processors based on the Arm architecture, which brings Arm to the public cloud as a first class citizen. Docker Developers can now build ARM containers on AWS Cloud Platform.
A Brief about AWS Graviton Processors..
Amazon announced the availability of EC2 instances on its Arm-based servers during AWS re:Invent(December 2018). AWS Graviton processors are a new line of processors that are custom designed by AWS targeted in building platform solutions for cloud applications running at scale.The Graviton based instances are known as EC2 A1. These instances are targeted at scale-out workloads and applications such container based microservices, web sites, and scripting language-based applications (e.g., Ruby, Python, etc.)
EC2 A1 instances are built on the AWS Nitro System, a combination of dedicated hardware and lightweight hypervisor, which maximizes resource efficiency for customers while still supporting familiar AWS and Amazon EC2 instance capabilities such as EBS, Networking, and AMIs. Amazon Linux 2, Red Hat Enterpise Linux (RHEL), Ubuntu and ECS optimized AMIs are available today for A1 instances. Built around Arm cores and making extensive use of custom-built silicon, the A1 instances are optimized for performance and cost.
Under this blog post, I will showcase how to deploy Containers on AWS EC2 A1 instance using Docker Machine running on Docker Desktop for Windows.
Pre-requisites:
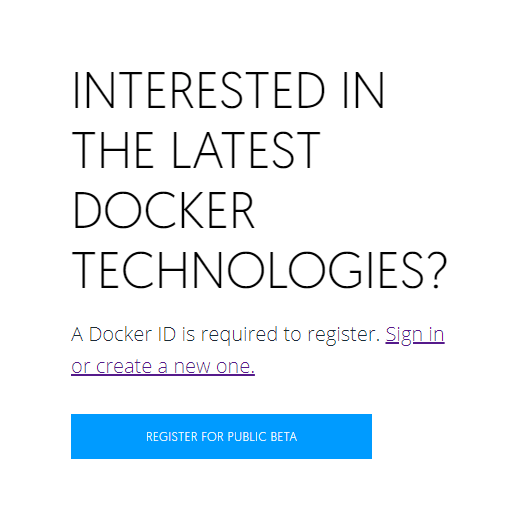
- Open up https://beta.docker.com page and it will ask to register for public beta as shown below:

- Click on “Register for Public Beta”. This will open up various options to test drive Docker products

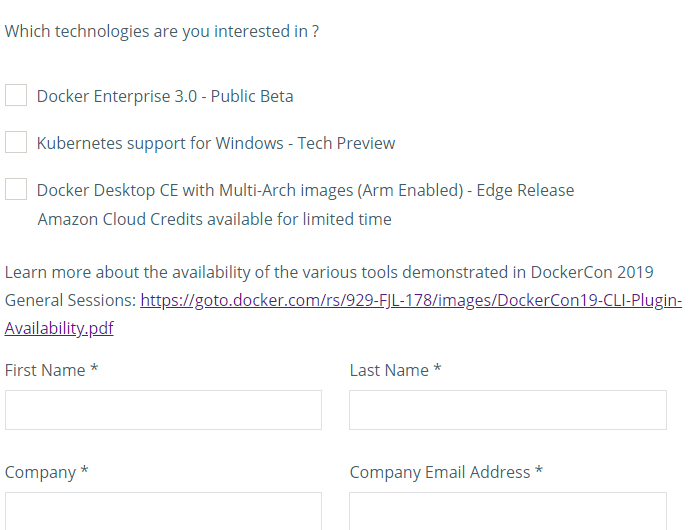
- Don’t forget to Select “Docker Desktop CE with Multi-Arch images (Arm Enabled) – Edge Release Amazon Cloud Credits available for limited time” option.
- Enter your details and this will open.
- You will see an option to sign up for credits for Amazon EC2 A1 instances via https://www.surveymonkey.com/r/DockerCon19AWS.
- Click on Sign Up
Creating AWS Account
- Go to aws.amazon.com and create Free Tier Account
- By now, you must have received email from Amazon on Free Credits of $50.
- Open up https://aws.amazon.com/amazoncredits and add the Promo Code
Creating AWS A1 Instance
We will use Docker Desktop for Windows which comes installed with Docker Machine to bring up ARM instances quickly.
Go to My Security Credentials under your Account and Click “Access Keys” shown below to display Access Key IDs.

Run the below command to set the environmental variable for ACCESS_KEY_ID as well as SECRET_ACCESS_KEY ID.
PS C:\Users\Ajeet_Raina> set ACCESS_KEY_ID=XXX
PS C:\Users\Ajeet_Raina> set SECRET_ACCESS_KEY=XX
Running Docker Machine to bring up our first Docker Node on AWS A1 ARM instance
Docker Desktop for Windows comes with Docker Machine by default and there is NO need to install it separately.
PS C:\Users\Ajeet_Raina> docker-machine create --driver amazonec2 --amazonec2-access-key=${ACCESS_KEY_ID} --amazonec2-secret-key=${SECRET_ACCESS_KEY} --amazonec2-region=us-west-2 --amazonec2-vpc-id=vpc-ae59f0d6 --amazonec2-ami=ami-0db180c518750ee4f --amazonec2-instance-type=a1.medium arm-node1By now, you should be able to see arm-node1 up and running on your AWS environment.

Listing out the ARM Nodes
PS C:\Users\Ajeet_Raina> docker-machine ls
NAME        ACTIVE   DRIVER      STATE     URL                         SWARM   DOCKER     ERRORS
arm-node1   -        amazonec2   Running   tcp://34.218.208.175:2376           v18.09.6
PS C:\Users\Ajeet_Raina>
Login into the first Node
You can use docker-machine ssh
PS C:\Users\Ajeet_Raina> docker-machine ssh arm-node1
Welcome to Ubuntu 18.04.1 LTS (GNU/Linux 4.15.0-1028-aws aarch64)

 * Documentation:  https://help.ubuntu.com
 * Management:     https://landscape.canonical.com
 * Support:        https://ubuntu.com/advantage

  System information as of Thu May 16 04:35:16 UTC 2019

  System load:  0.06              Processes:              116
  Usage of /:   9.1% of 15.34GB   Users logged in:        0
  Memory usage: 10%               IP address for ens5:    172.31.60.52
  Swap usage:   0%                IP address for docker0: 172.17.0.1


  Get cloud support with Ubuntu Advantage Cloud Guest:
    http://www.ubuntu.com/business/services/cloud

178 packages can be updated.
86 updates are security updates.
This node comes with Docker 18.09.6 installed.
ubuntu@arm-node1:~$ sudo docker version
Client:
 Version:           18.09.6
 API version:       1.39
 Go version:        go1.10.8
 Git commit:        481bc77
 Built:             Sat May  4 02:40:48 2019
 OS/Arch:           linux/arm64
 Experimental:      false

Server: Docker Engine - Community
 Engine:
  Version:          18.09.6
  API version:      1.39 (minimum version 1.12)
  Go version:       go1.10.8
  Git commit:       481bc77
  Built:            Sat May  4 02:00:10 2019
  OS/Arch:          linux/arm64
  Experimental:     false
ubuntu@arm-node1:~$
Checking the Node IP
PS C:\Users\Ajeet_Raina> docker-machine ip arm-node1
34.218.208.175
Running ARM-based Portainer v1.20.2 Container
Before we run Portainer, we need to ensure that the port 9000 is open for accessibility.

Click on Actions > Inbound Rules and add 9000 for Portainer. Allowing “All TCP” from 0-65535 is just for testing purpose and not recommended for the production environment.

ubuntu@ip-172-31-62-91:~$ sudo docker run --rm mplatform/mquery portainer/portainer
Unable to find image 'mplatform/mquery:latest' locally
latest: Pulling from mplatform/mquery
db6020507de3: Pull complete
713cdc222639: Pull complete
Digest: sha256:e15189e3d6fbcee8a6ad2ef04c1ec80420ab0fdcf0d70408c0e914af80dfb107
Status: Downloaded newer image for mplatform/mquery:latest
Image: portainer/portainer
 * Manifest List: Yes
 * Supported platforms:
   - linux/amd64
   - linux/arm
   - linux/arm64
   - linux/ppc64le
   - windows/amd64:10.0.14393.2551
   - windows/amd64:10.0.16299.967
   - windows/amd64:10.0.17134.590
   - windows/amd64:10.0.17763.253
Initialising Docker Swarm Mode on Arm-based EC1 instance
Follow the below steps to setup 2 Node Docker Swarm Mode cluster on AWS Platform using Docker Machine.
PS C:\Users\Ajeet_Raina> docker-machine create  --driver amazonec2  --amazonec2-access-key=${ACCESS_KEY_ID}  --amazonec2-secret-key=${SE
CRET_ACCESS_KEY} --amazonec2-region=us-west-2 --amazonec2-vpc-id=vpc-ae59f0d6 --amazonec2-ami=ami-0db180c518750ee4f --amazonec2-open-por
t 2377 --amazonec2-open-port 7946 --amazonec2-open-port 4789 --amazonec2-open-port 7946/udp --amazonec2-open-port 4789/udp --amazonec2-open-port 8080 --amazonec2-open-port 443 --amazonec2-open-port 80 --amazonec2-subnet-id=subnet-827651c9 --amazonec2-instance-type=a1.medi
um arm-swarm-node2
Running pre-create checks...
Creating machine...
(arm-swarm-node2) Launching instance...
Waiting for machine to be running, this may take a few minutes...
Detecting operating system of created instance...
Waiting for SSH to be available...
Detecting the provisioner...
Provisioning with ubuntu(systemd)...
Installing Docker...
Copying certs to the local machine directory...
Copying certs to the remote machine...
Setting Docker configuration on the remote daemon...
You can open all ports on AWS using the below command:
PS C:\Users\Ajeet_Raina> aws ec2 authorize-security-group-ingress --group-name docker-machine --protocol -1 --cidr 0.0.0.0/0Initialising Docker Swarm Manager
PS C:\Users\Ajeet_Raina> docker-machine ssh arm-swarm-node1 sudo docker swarm init
Swarm initialized: current node (oqk875mcldbn28ce2rip31fg5) is now a manager.

To add a worker to this swarm, run the following command:

    docker swarm join --token SWMTKN-1-6bw0zfd7vjpXX17usjhccjlg3rs 172.31.50.5:2377

To add a manager to this swarm, run 'docker swarm join-token manager' and follow the instructions.

PS C:\Users\Ajeet_Raina> docker-machine ssh arm-swarm-node2 sudo docker swarm join --token SWMTKN-1-6XX23ye817usjhccjlg3rs 172.31.50.5:2377
This node joined a swarm as a worker.
Adding Worker Node
PS C:\Users\Ajeet_Raina> docker-machine ssh arm-swarm-node2 sudo docker swarm join --token SWMTKN-1-6bw0zfXXXhccjlg3rs 172.31.50.5:2377
This node joined a swarm as a worker.
Verifying 2-Node Swarm Cluster
ubuntu@arm-swarm-node1:~$ sudo docker node ls
ID                            HOSTNAME            STATUS              AVAILABILITY        MANAGER STATUS      ENGINE VERSION
oqk875mcldbn28ce2rip31fg5 *   arm-swarm-node1     Ready               Active              Leader              18.09.6
f3rwuj6f6mghte3630car83ia     arm-swarm-node2     Ready               Active                                  18.09.6
ubuntu@arm-swarm-node1:~$
Building Up Portainer Application Stack
ubuntu@ip-172-31-62-91:~$ sudo docker stack deploy --compose-file=portainer-agent-stack.yml portainer
Creating network portainer_agent_network
Creating service portainer_portainer
Creating service portainer_agent
ubuntu@ip-172-31-62-91:~$
Listing out Portainer Stack
ubuntu@arm-node1:~$ sudo docker stack ls
NAME                SERVICES            ORCHESTRATOR
portainer           2                   Swarm
ubuntu@arm-node1:~$ sudo docker service ls
ID NAME MODE REPLICAS IMAGE PORTS
k5651aoxgqhk portainer_agent global 1/1 portainer/agent:latest
yoembxxj25k8 portainer_portainer replicated 1/1 portainer/portainer:latest *:9000->9000/tcpViewing Portainer Dashboard

Portainer UI showing a Single Node Swarm Mode Cluster

In my future post, I am going to showcase how I leveraged buildx CLI plugin & AWS EC2 A1 instance to build in-house project called “Pico” for Deep Learning using Apache Kafka, IoT & Amazon Rekognition Service. Stay tuned !
Comments are closed.