Running out of disk space on your Mac can hinder productivity and slow down your system. In this guide, we’ll explore powerful macOS utilities and command-line tools to locate and clean up the largest files and directories. Follow along to free up space while maintaining optimal system performance.
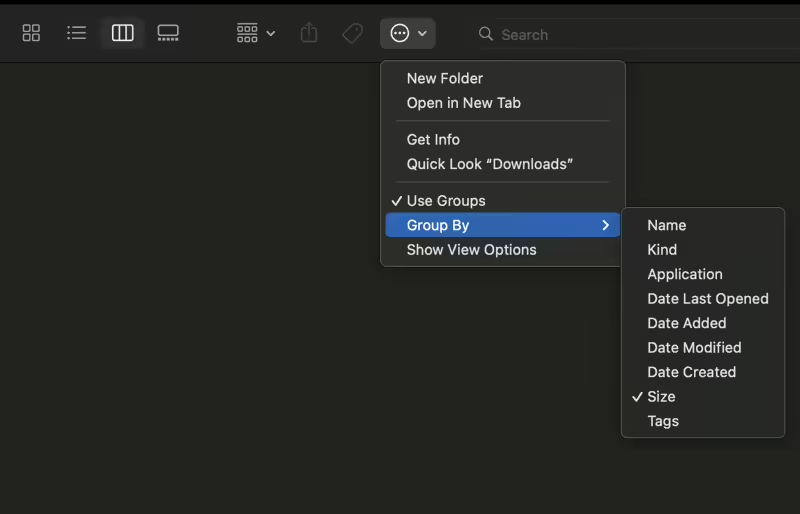
Step 1: Analyze Disk Usage with Finder

The Finder is macOS’s built-in file explorer and provides an intuitive way to view folder sizes.
Steps:
- Open
Finder - Navigate to the folder you want to analyze
- Switch to
List View(View > As List) - Go to
View>Show View Optionsor pressCmd + J. Check the Calculate all sizes option.

Step 2: Use “About This Mac” Storage Insights
Leverage macOS’s About This Mac feature for a categorized overview of disk usage.
- Click on the
Appleicon and selectAbout This Mac. - Go to the
Storagetab. - Click
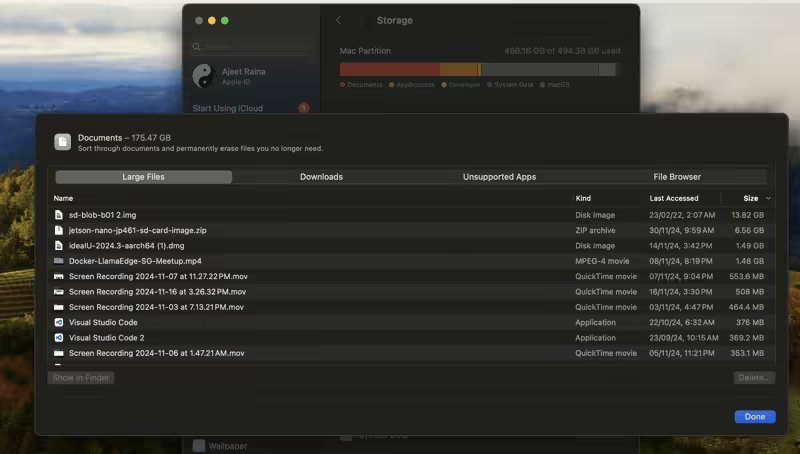
Manage… to review large files by category, includingApplications,Documents, andTrash.

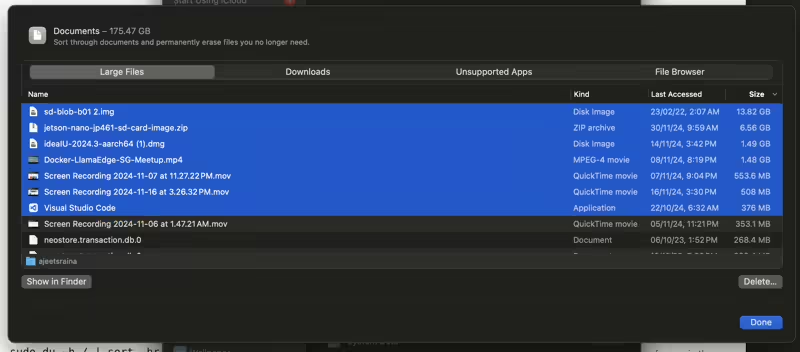
I found that the large files on my Mac consume 175GB. Let’s remove those unwanted ISO files from the system.

This way, I removed around 100 GB of unwanted space from my system.
Step 3: Identify Large Files via Terminal
For advanced users, macOS’s Terminal provides precise control over disk usage analysis.
sudo du -h / 2>/dev/null | sort -hr | head -n 20 The command sudo du -h / 2>/dev/null | sort -hr | head -n 20 is a powerful pipeline often used to identify the largest directories or files on a Linux system. Here’s a breakdown:
Command Explanation
- The
sudoruns the command with superuser privileges to ensure access to all files and directories. - The
dustands for “disk usage.” It calculates the size of directories and files. The -h makes the output human-readable (e.g., 1K, 234M, 2G instead of raw bytes). - The
/specifies the root directory as the starting point for calculating disk usage.
`The / specifies the root directory as the starting point for calculating disk usage. - The
2>/dev/nullredirects error messages (from file descriptor 2) to /dev/null, effectively discarding them. This suppresses “permission denied” errors and other irrelevant messages. - The
sort -hrpipes the output of the previous command into the next command. - The
sortsorts the output. - The
-hsorts in human-readable format (understands sizes like K, M, G). - The
-rsorts in reverse order, displaying the largest items first. - The
head -n 20displays the first few lines of the input limits the output to the top 20 entries.
Step 4: Clean Up with Disk Utility
Use Disk Utility to remove unnecessary snapshots or partitions:
- Open
Disk Utilityfrom Spotlight (Cmd + Space > search for Disk Utility). - Select your primary disk and look for APFS Snapshots.
- Delete unused snapshots to reclaim space.
Step 5: Automate Cleanup with Third-Party Tools
Install tools like DaisyDisk or GrandPerspective to visualize disk space usage.

Example:
- Install DaisyDisk from the App Store.
- Scan your disk and identify space hogs with an interactive map.
Best Practices for Regular Maintenance
- Empty Trash regularly.
- Uninstall unused apps with a command:
sudo rm -rf /Applications/UnusedApp.app - Clear browser cache and logs.
Conclusion
Reclaiming storage space on your Mac doesn’t have to be daunting. Whether you use Finder, Terminal, or third-party tools, this guide equips you with the know-how to tackle large files and keep your Mac in optimal condition.
