An engaging video is produced by converting a sequence of images into videos. You can quickly create videos from an image series to make static images move. It allows the viewers to engage with it and is a great method to express a memory, idea, or work of art.
To accomplish that, you will need a video editing application. Wondershare Filmora is one such application that makes things simple. It allows you to easily import, organize, and change image sequences. You can even use filters, effects, and transitions to change your video. It’s perfect for social networking and business presentations.
In this article, we will discuss how to add effects when converting image sequence to video in Filmora.
Part 1: Setting Up Your Image Sequence in Filmora
Wondershare Filmora is a creative app that enables a user to easily turn a series of images into a video. It makes the entire procedure very easy to understand. Even if you are a beginner, you can upload photographs quickly, rearrange them, and combine them efficiently. The software’s drag-and-drop interface prevents all issues.
The program is flexible and suitable for everyone. It consistently produces superb results. You can use Filmora’s features to create a successful slideshow, time-lapse, or short animation. Filmora is the ideal option for anyone wanting to convert an image sequence into a video.
How to Convert a Sequence of Images into a Video
Here, we will discuss how to convert image sequences into video in Filmora.
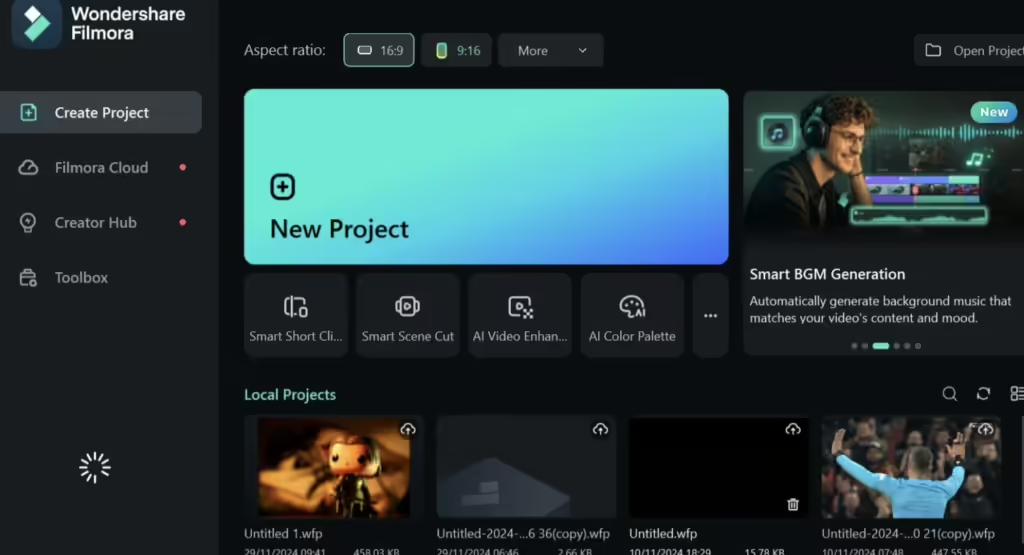
- Step 1: Open Filmora, then select “New Project.”
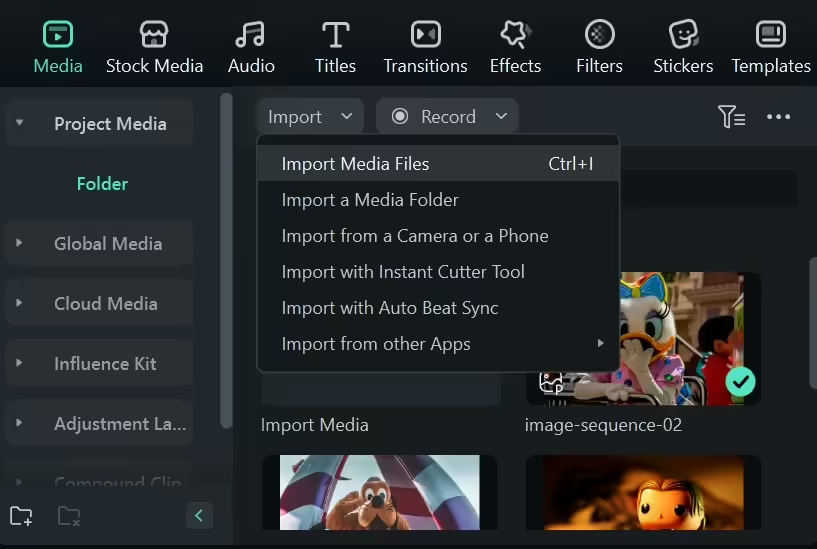
- Step 2: Click on import media to add images to Filmora. Click Open after choosing the images. Make sure the files are named properly and are in the JPEG/JPG format.
- Step 3: Each image can be dragged and dropped onto the timeline. Each frame’s duration can be altered easily by clicking on it.
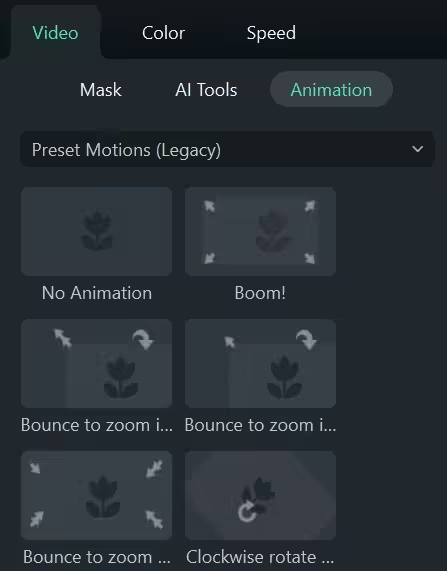
- Step 4: To animate your photos, select a preset by going to Video > Animation in the Properties window.
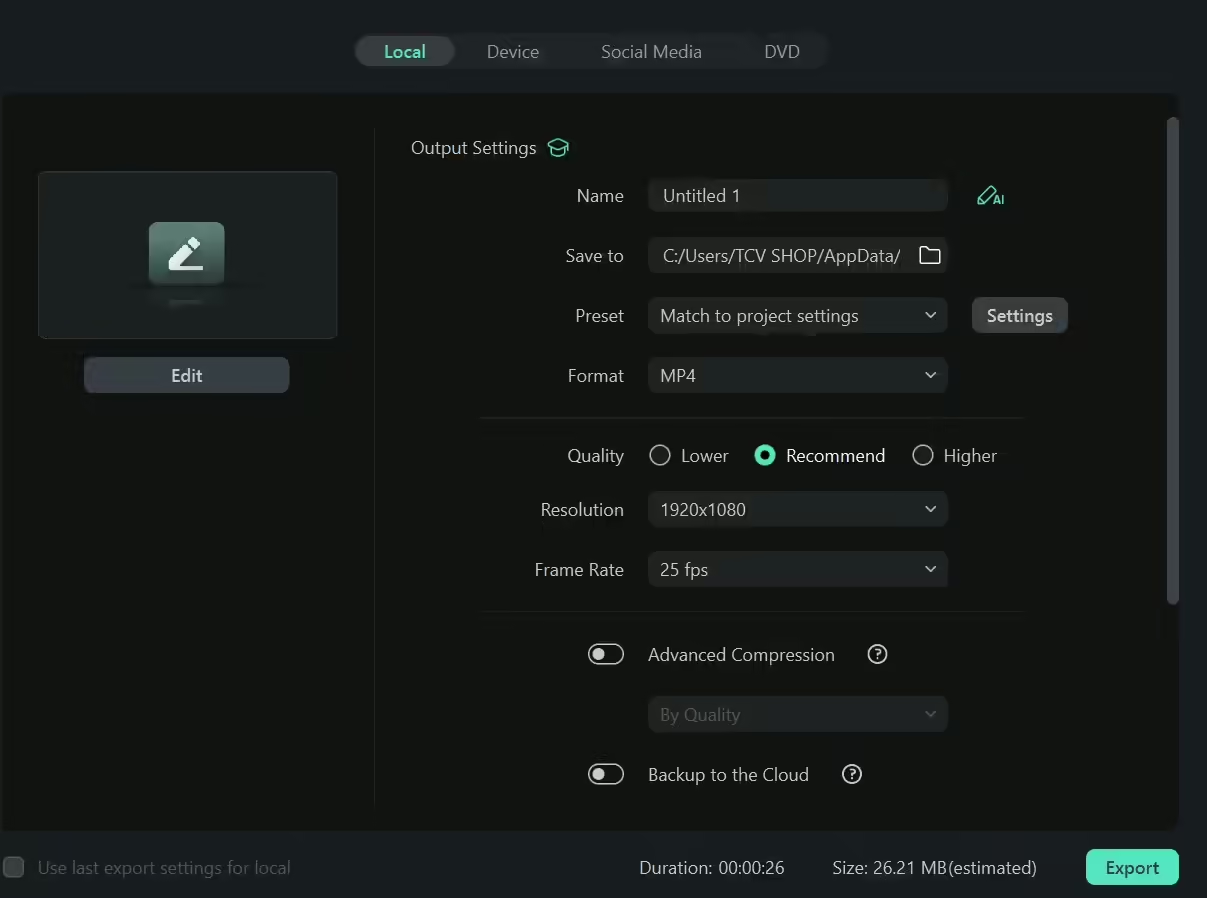
- Step 5: After adjusting the output parameters, click Export.
Part 2: How to Add Filters and Effects
It is essential to ensure that the video is stunning, and this can be done through filters. Filters can change the overall viewpoint and tone of a video. They provide more illustrations, colors, and environments for the content. They allow for adding attractive details such as leak lights, lens flares, and overlay artworks.
Filmora is one of the greatest apps for applying filters and effects to videos. You can also easily apply multiple effects to the Filmora image sequence to make it look professional. There is a lot of opportunity for easy maintenance of filters and effects. You can use it for a vintage look, a cinematic atmosphere, or brilliant hues.
How to Apply Filters in Filmora
Here are step-by-step methods to apply filters in Filmora.
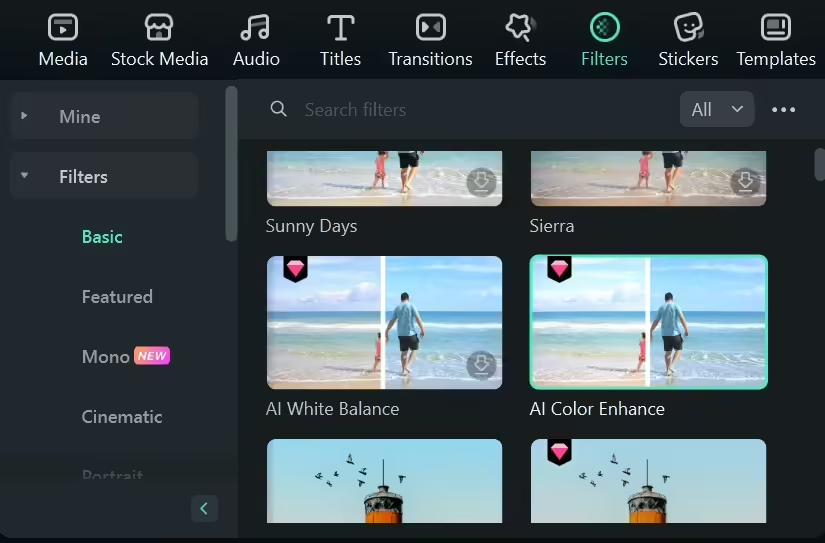
- Step 1: Navigate to the Filters Tab
Navigate to the Filters tab after opening your project.
- Step 2: Add the Filter to the Timeline
Move your mouse pointer over the desired filter. Click the Plus icon that appears in the center. The filter will then be applied to the video in the timeline. You can also drag and drop it straight into the desired video clip on your timeline.

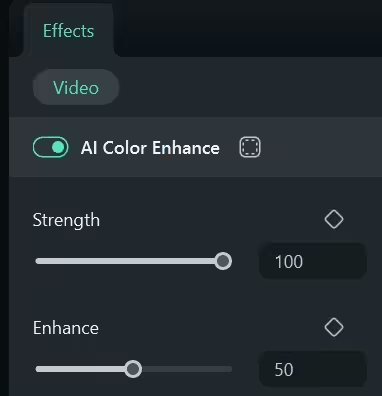
- Step 3: Customizing the Filter Effect
To alter the effect’s duration, slide its edge across your timeline. Then, to change the opacity of the filter on the timeline, double-click on it. The range of the opacity is 0-100. The filter is more transparent at lower values.
- Step 4: Add Filter to the Favorite Tab
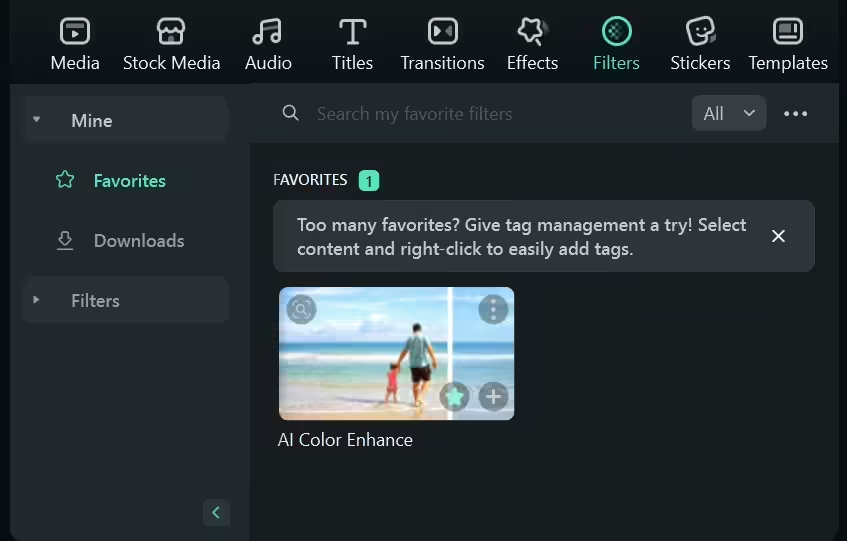
After selecting your preferred filter, locate the Star icon and click on it to change the star’s color to green. This will add your filter effects to the favorite tab, so you can use it easily next time.
How to Apply Effects in Filmora
Here are step-by-step methods of applying the Mosaic effect in Filmora.
- Step 1: Adding Effects to the Video
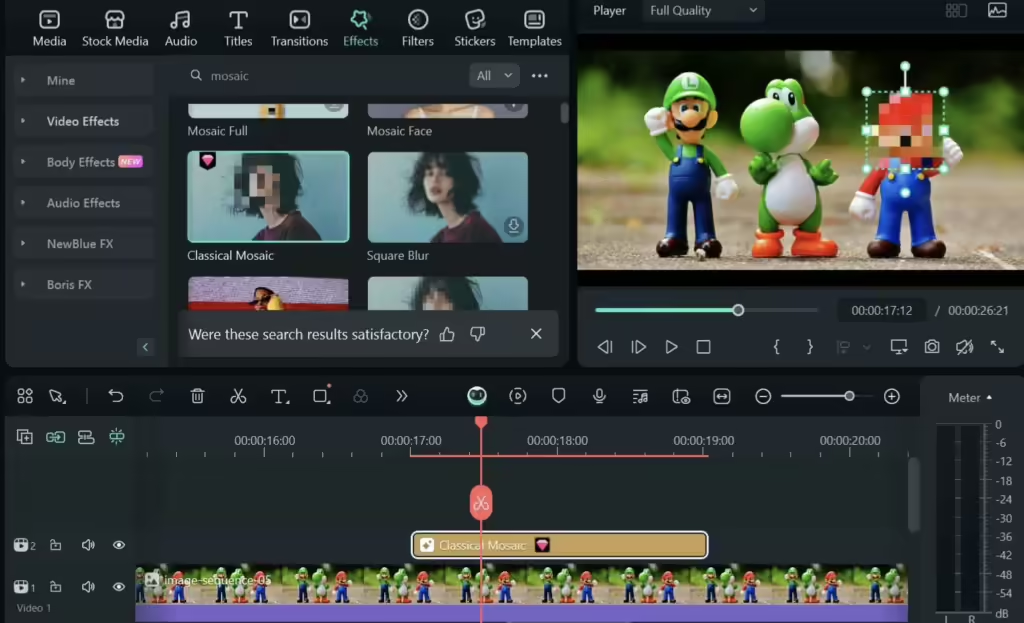
Locate Video Effects under the Effects menu at the top, then select Trending. Locate the effects and choose from them. For instance, choose the Mosaic effect, then drag it to the timeline.
You can drag the effect to the desired period in the timeline and change its duration. To get the desired effects, drag the handles of the mosaic effect in the Preview window to change its size and location.
- Step 2: Modify the Mosaic Effect
Click on the Mosaic effect. You can select the blur type from presets in the Effects editing panel. To change the Opacity and Blur Amount, you can also drag the slider.
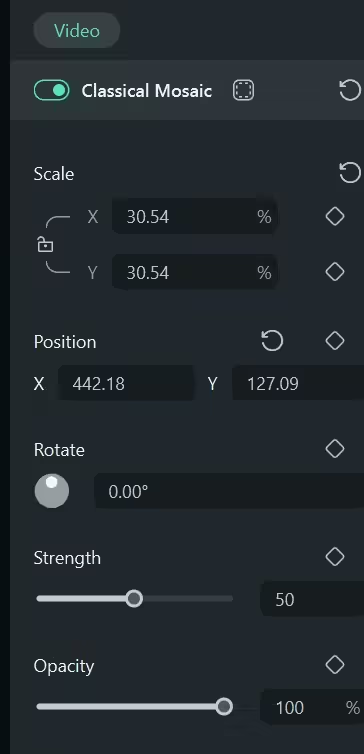
- Step 3: Modify the Mosaic Effect using Pixels
To change the settings of one of the pixelate effects, drag it and then click on it in the timeline. To get the ideal look, you can then modify the pixelate mosaic effect’s size and Opacity.
Part 3: Enhancing Transitions in Filmora
Transitions are key aspects for connecting your images. Without a smooth and seamless transition, no video is ever perfect. A lack of excellent transitions can make a video disorganized. Also, it can make jumping over one transition rapidly feel harsh.
Filmora has various unique transition effects that are not found in other editors. Such effects include wipes, fades, and even three-dimensional flips. They have been designed to offer a smooth flow to your video, and each of them will help do so. Depending on the theme of your video, you can always choose from a variety of transitions.
Using Filmora, the duration, speed, and positioning of video and images are customizable. This ensures that every transition is as suitable as possible for your content. With the right transition techniques in your content, your images will integrate seamlessly.
How to Add Transitions
Here, we will discuss step-by-step methods to add transitions.
- Step 1: Select and Save the Transitions
To download the transitions, click the button; it will take a moment. Then go to “Transitions” in the top menu.
- Step 2: Drag the Timeline Transition
Drag it to the start or finish of a timeline image or video clip. The transition between the two videos can also be placed there.

- Step 3: Export your Video
Choose “Export” in the upper right corner. Make a video out of your excellent transition video and show it to your viewers!
Conclusion
Filmora image sequence simplifies the process of turning still images into films. This feature-rich platform offers several ways to assist you in producing quality content and support your image-to-video conversion. Its dozens of video effects may add creativity and brilliance to your audio or video content.
Even if you have never tried image-to-video conversion before, you won’t have any trouble using Filmora because it is incredibly user-friendly. To discover how Filmora can change your experience, give it a try for free.
