
Docker containers provide excellent isolation for applications, but accessing physical USB devices within a container can be challenging. By leveraging the USB/IP protocol, you can share USB devices over the network and use them in Docker containers.
This guide will walk you through:
- Setting up and running a USB/IP server
- Connecting USB devices to a privileged Docker container
- Sharing USB devices with other containers
We’ll use USB/IP, nsenter, and Docker to facilitate USB over IP and simplify device management.
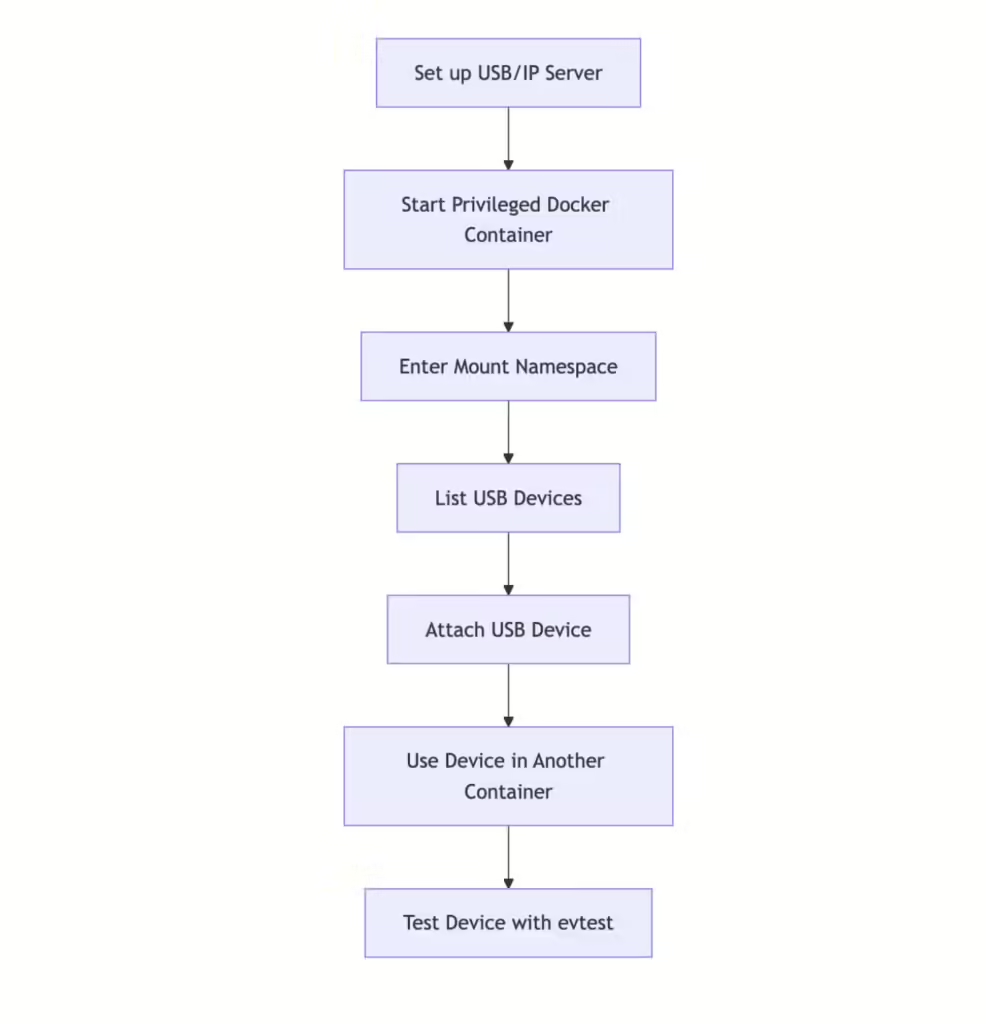
Step 1: Clone and Set Up the USB/IP Server
We will use the usbip implementation to run a USB/IP server. First, clone the repository:
git clone https://github.com/jiegec/usbip
cd usbip


# Run the USB/IP example for a HID keyboard
env RUST_LOG=info cargo run --example hid_keyboard
Step 2: Run a Privileged Docker Container
To interact with the USB devices, start a privileged container with the PID namespace set to host:
docker run --rm -it --privileged --pid=host alpineStep 3: Enter the Mount Namespace
Inside the container, enter the mount namespace of the init process to access pre-installed USB/IP tools and make device node lookups easier:
nsenter -t 1 -mStep 4: List Available USB Devices
Use the USB/IP tools to list exportable USB devices from the host system:
usbip list -r host.docker.internalExample Output:
usbip: error: failed to open /usr/share/hwdata//usb.ids
Exportable USB devices
======================
 - host.docker.internal
     0-0-0: unknown vendor : unknown product (0000:0000)
        : /sys/bus/0/0/0
        : (Defined at Interface level) (00/00/00)
        : 0 - unknown class / unknown subclass / unknown protocol (03/00/00)
Step 5: Attach a USB Device
Attach the desired USB device using the usbip attach command:
usbip attach -r host.docker.internal -d 0-0-0

# Verify the attached device
ls /dev/input/
Example Output:
event0 miceStep 6: Use the USB Device in Another Container
With the USB device attached, you can use it in a separate container:
# Start a new container with the device
docker run --rm -it --device "/dev/input/event0" alpine

# Install evtest
apk add evtest

# Test the device
evtest /dev/input/event0
Example Output:
Input driver version is 1.0.1
Input device ID: bus 0x3 vendor 0x0 product 0x0 version 0x111
...
Properties:
Testing ... (interrupt to exit)
Event: time 1717575532.881540, type 4 (EV_MSC), code 4 (MSC_SCAN), value 7001e
Event: time 1717575532.881540, type 1 (EV_KEY), code 2 (KEY_1), value 1
Event: time 1717575532.881540, -------------- SYN_REPORT ------------
Important Tips and Notes
- Keep the initial container running while working with the attached device. Exiting it will stop the device from working.
- Use nsenter to simplify access to host-level tools within a container.
- Ensure your Docker setup supports privileged containers for seamless USB/IP integration.
By following this guide, you can successfully set up a USB/IP server, attach USB devices to a privileged Docker container, and share those devices with other containers. This approach is particularly useful for hardware-dependent applications, enabling seamless integration of physical USB devices with containerized environments.