
In recent years, the convergence of Kubernetes and AI (Artificial Intelligence) has paved the way for groundbreaking advancements in computing. Kubernetes, an open-source container orchestration platform, coupled with the capabilities of AI, has revolutionized the deployment, management, and scalability of complex applications. This powerful combination offers unparalleled opportunities for organizations to harness the potential of AI and unlock new frontiers in various industries. In this blog post, we will explore the symbiotic relationship between Kubernetes and AI, the benefits they bring, and the transformative impact they have on the future of computing.
To demonstrate the power of Kubernetes and OpenAI, we will look at kubectl-ai project. This project is a kubectl plugin to generate and apply Kubernetes manifests using OpenAI GPT. To make it more interesting and understand in a visualized way, we will first install Kubeview and then leverage Kubectl + OpenAI plugin. Let’s dive in.
Implementing Kubeview
Kubeview is a Kubernetes cluster visualization tool that offers a graphical representation of your cluster’s resources, including pods, deployments, services, and more. It provides a visual interface to explore and navigate through the various components of your cluster, helping you gain insights into resource allocation, dependencies, and performance.
Using Helm
Assuming that you have already installed Git and Helm on your laptop, follow the below steps
git clone https://github.com/benc-uk/kubeview
cd kubeview/charts/
helm install kubeview kubeview
Testing it locally
kubectl port-forward svc/kubeview -n default 80:80
Using Kubectl
To start using Kubeview, you need to install it in your Kubernetes cluster. Follow these steps:
Step 1: Deploy the Kubeview application
Kubeview can be deployed as a Kubernetes application using a YAML manifest file. Simply apply the manifest to your cluster using the following command:
kubectl apply -f https://raw.githubusercontent.com/benc-uk/kubeview/main/deploy/kubeview.yamlStep 2: Verify the installation:
After applying the manifest, check that Kubeview is up and running by executing the following command:
kubectl get pods -n kubeviewExploring Your Cluster with Kubeview
Once Kubeview is installed, you can access its web-based interface to explore your Kubernetes cluster visually. Here’s how to get started:
Step 1: Access the Kubeview dashboard
Retrieve the URL to access the Kubeview dashboard by executing the following command:
kubectl --namespace kubeview port-forward service/kubeview 8080:80This command sets up a port forward to access Kubeview on your local machine.
Step 2: Open the Kubeview dashboard
Open a web browser and visit http://localhost:8080 to access the Kubeview dashboard. You will be greeted with an intuitive interface that displays an overview of your cluster’s resources.
Step 3: Navigate through your cluster
Explore your cluster by clicking on different resources in the Kubeview interface. You can drill down into pods, deployments, services, and other components to visualize their relationships and connections. Kubeview provides clear visual representations, such as node graphs and dependency diagrams, to help you understand the structure of your cluster.
Step 4: Analyze resource details
Clicking on individual resources reveals detailed information about them, including resource usage, health status, and labels. You can also view logs and events associated with each resource, allowing for efficient troubleshooting and monitoring.
Leveraging Kubeview’s Advanced Features
Kubeview offers additional advanced features that enhance your cluster exploration and monitoring experience. These include:
-
Search and filter capabilities: Use Kubeview’s search and filter functionalities to quickly locate specific resources or filter them based on labels, namespaces, or other criteria.
-
Real-time updates: Kubeview automatically updates the visual representation of your cluster as changes occur, providing you with near real-time insights into the state of your resources.
-
Support for multiple clusters: If you manage multiple Kubernetes clusters, Kubeview can handle them all. You can easily switch between clusters within the Kubeview interface.
In the next section, you will learn how to setup kubectl-ai from the scratch.
Getting Started
- Docker Desktop
- Install Kubectl-ai
brew tap sozercan/kubectl-ai https://github.com/sozercan/kubectl-ai
brew install kubectl-ai- Get OpenAI Keys via https://platform.openai.com/account/api-keys
kubectl-ai requires an OpenAI API key or an Azure OpenAI Service API key and endpoint, and a valid Kubernetes configuration.
Creating your first Nginx Pod
kubectl ai "create an nginx pod"
✨ Attempting to apply the following manifest:
apiVersion: v1
kind: Pod
metadata:
  name: nginx-pod
spec:
  containers:
  - name: nginx
    image: nginx
    ports:
    - containerPort: 80
Use the arrow keys to navigate: ↓ ↑ → ←
? Would you like to apply this? [Reprompt/Apply/Don't Apply]:
+   Reprompt
  ▸ Apply
    Don't Apply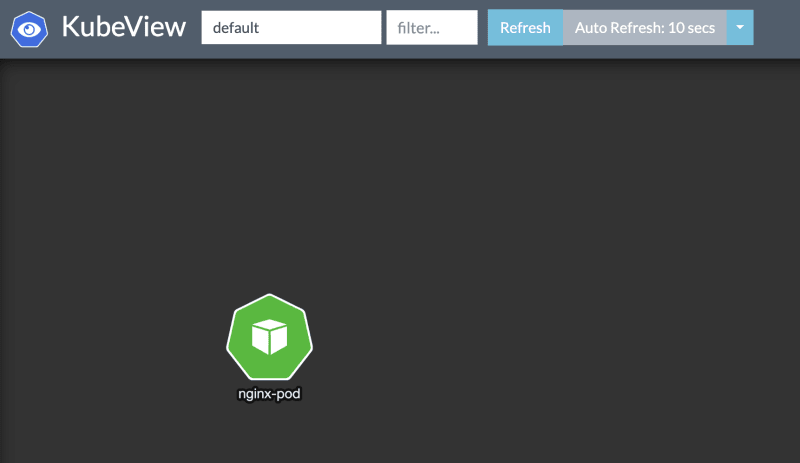
Deployment
Select “Reprompt” and type “make this into deployment”
Reprompt: make this into deployment
✨ Attempting to apply the following manifest:
apiVersion: apps/v1
kind: Deployment
metadata:
  name: nginx-deployment
spec:
  replicas: 1
  selector:
    matchLabels:
      app: nginx
  template:
    metadata:
      labels:
        app: nginx
    spec:
      containers:
      - name: nginx
        image: nginx:1.7.9
        ports:
        - containerPort: 80
ReplicaSet
Reprompt: Scale to 3 replicas
Reprompt: Scale to 3 replicas
✨ Attempting to apply the following manifest:
apiVersion: apps/v1
kind: Deployment
metadata:
  name: nginx-deployment
spec:
  replicas: 3
  selector:
    matchLabels:
      app: nginx
  template:
    metadata:
      labels:
        app: nginx
    spec:
      containers:
      - name: nginx
        image: nginx
        ports:
        - containerPort: 80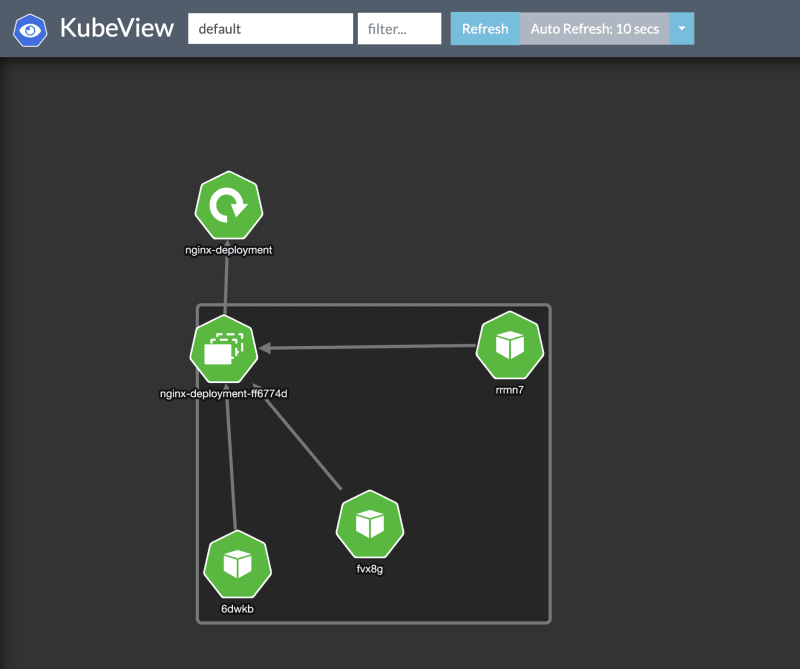
kubectl ai "Create Nginx Pod running on port 82 with 3 replicasets labeled web"Services
kubectl ai "create a service for the nginx deployment with load balancer that uses nginx selector"
✨ Attempting to apply the following manifest:
apiVersion: v1
kind: Service
metadata:
  name: nginx-service
spec:
  selector:
    app: nginx
  ports:
  - port: 80
    targetPort: 80
  type: LoadBalancer
✔ Apply
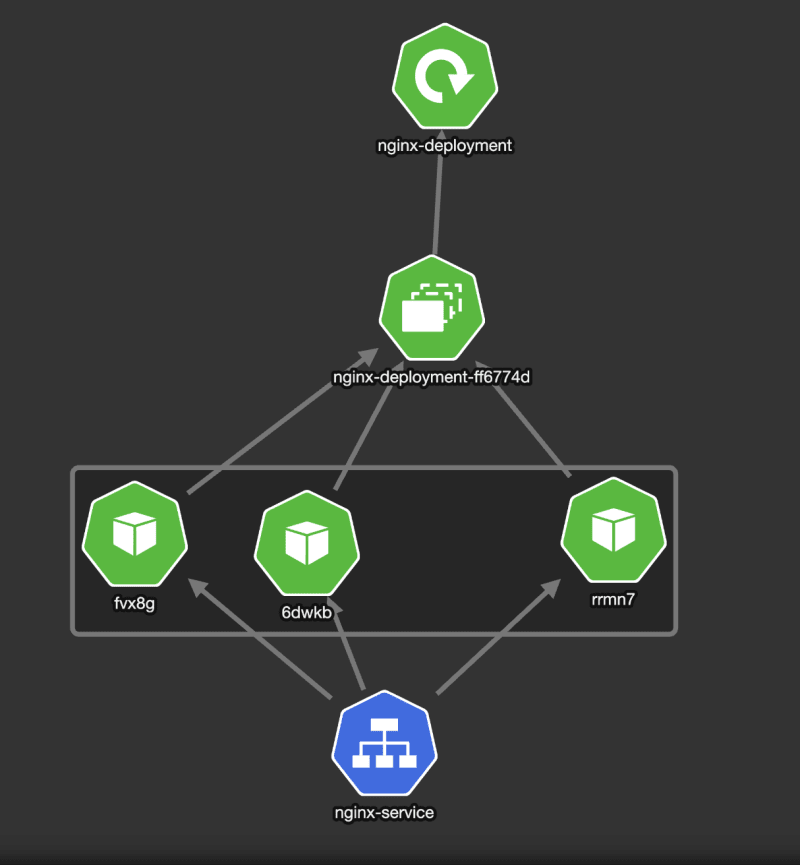
Here’s the final view of the Kubeview:

Conclusion
The world of Kubernetes is constantly evolving, with new tools and plugins emerging to enhance its functionality and make management tasks more convenient. Kubectl-ai looks to be a powerful extension that integrates OpenAI’s GPT (Generative Pre-trained Transformer) model with the Kubernetes command-line tool (kubectl). Kubectl-ai brings the power of AI-generated suggestions and automation to streamline Kubernetes operations, making it easier for developers and administrators to interact with their Kubernetes clusters. In this blog post, you explored the capabilities of Kubectl-ai and how it can revolutionize the Kubernetes management experience. Happy Kube-GPTing !!!