
Thanks to Collabnix community members Abhinav Dubey, Ashutosh Kale and Vinodkumar Mandalapu for all the collaboration and contribution towards this blog post series.

In the last blog post, we discussed about the rising pain of Enterprise businesses and the popular tools “Popeye – A Kubernetes Cluster Sanitizer”. Under this blog, we will cover two of the most widely used Kubernetes tools – Portainer and K3d.
K3d – k3s in Docker
K3d as the name itself suggests, k3s-in-docker is a wrapper around k3s – Lightweight Kubernetes that runs it in docker. It provides a seamless experience working with k3s cluster management with some straight forward commands. K3d is efficient enough to create and manage k3s single node and well as k3s High Availability clusters just with few commands.

In this blog, let’s see how easily we can spin up k3s cluster in docker within seconds and start using it for development on your machine.
Prerequisites
To install and run k3d, you must have docker and linux shell. If you are using windows or MacOS, Docker Desktop is preferred and for linux shell you can use WSL2. For linux operating systems docker cli is the preferred solution.
In this demonstration I will be using MacOS for setting up the k3s cluster in docker with k3d and managing the cluster.
Installation
K3d is platform agnostic and can be installed over Windows, MacOS and Linux.
In this demonstration, we will be using MacOS for installation and will install using the installation script. Please follow along the commands for successful installation of k3d.
The below command will install the k3d, in your system using the installation script.
wget -q -O - https://raw.githubusercontent.com/rancher/k3d/main/install.sh | bashFor installing k3d on other platforms, please check out the official documentation.
After the successful installation, you are ready to create your cluster using k3d and run k3s in docker within seconds.
k3d versionTo verify the installation, please run the following command –
If everything works fine, the output will look similar to the following image.

Getting Started
As we have successfully installed k3d on our local-machine, now it’s time to get our hands dirty!
Step 1 : Create k3D Cluster
k3d cluster create k3d-demo-cluster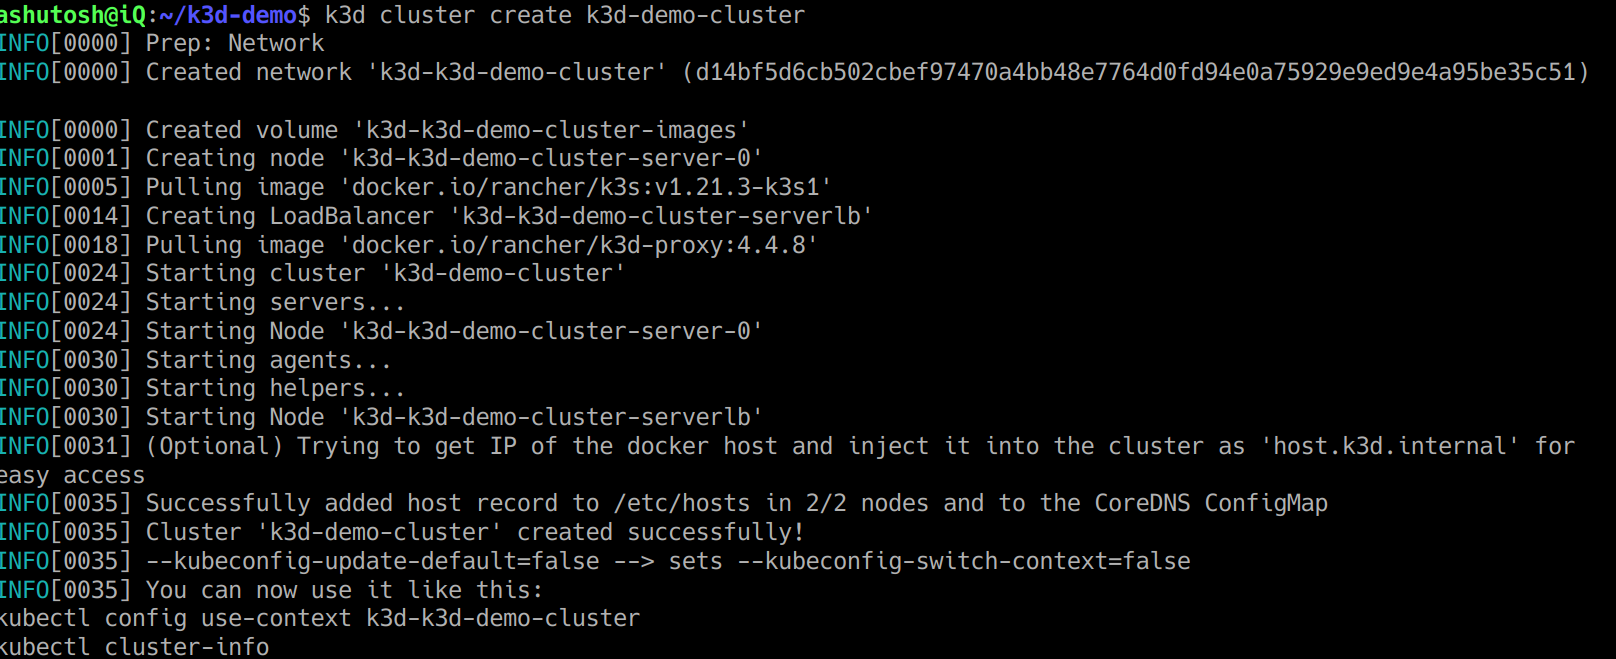
Step 2 : Switch context to newly created cluster.
kubectl config use-context k3d-k3d-demo-clusterStep 3 : Checking the nodes running on k3d cluster
k3d node listYou’ll get the list available nodes running in the cluster

Step 4 : Firing kubectl commands
About Kubectl – The kubernetes command-line tool, kubectl, allows you to run commands against Kubernetes
The below command will list down the nodes available in our cluster
kubectl get nodes -o wide
Now as you can observe, the cluster is up and running and we can play around the cluster, you can create and deploy your applications over the cluster.
Deleting Cluster
K3d is known for its rapid creation and deletion of clusters. After the work is done, you can easily delete your cluster by the following command.
k3d cluster delete k3d-demo-cluster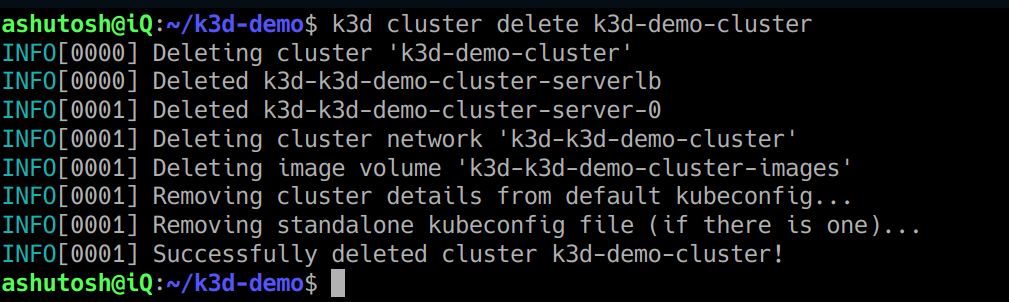
You can also create a k3d High Availability cluster and add as many nodes you want within seconds.
To learn more about k3d, please visit their Github Repository.
Portainer
Portainer is an open-source lightweight management graphical user interface that allows you to easily manage your Docker or Kubernetes environments. Portainer enables centralized configuration, management and security of Kubernetes and Docker environments, allowing you to deliver ‘Containers-as-a-Service’ to your users quickly, easily and securely.
You just can’t miss out the list of top 7 new features introduced under Portainer CE 2.0.
Top 8 critical factors that differentiate Portainer from other existing UI tools like Rancher
Learn how to deploy Portainer on Kubernetes Cluster in 5 Minutes
Portainer makes it easy for Platform Managers to centrally configure, manage and secure complex containerized environments, regardless of where they are hosted gives end users – typically developers – the ability to deploy, manage and troubleshoot containerized apps, as well as supporting an API that allows Portainer to integrate with industry standard CI/CD tools.
Portainer is available on Windows, Linux, and Mac. It works with Kubernetes, Docker, Docker Swarm. Few of the essential features includes:
- Application Deployment
- Observability and Monitoring
- Governance and Security
- Platform Management
Application Deployment
At its heart, Portainer helps developers deploy cloud-native applications into containers simply, quickly and securely. Portainer has its own simplified GUI, which makes it easy for users to get started. For advanced users, Portainer incorporates an API that allows it to connect to CI/CD tools or third-party dashboards/deployment tools.
For users who prefer to deploy applications manually using Portainer’s simplified UI, Portainer offers 4 deployment options:
- A step-by-step Application Deployment Form, which includes a number of input validators that help to reduce errors
- The option to use an existing compose or Kubernetes manifest files for code-based deployment
- Use HELM charts against Kubernetes endpoints
- Use our “click to deploy” Application Templates.
Portainer’s Application Deployment Form is by far the easiest and quickest way to get your application up and running. You don’t need to know how to write complex deployment code for Docker or Kubernetes, nor any need to know how best to deploy your application atop any orchestrator. You simply need to be able to answer some natural language questions about your application and Portainer will determine the best way to deploy it.
Observability:
To do their jobs properly, developers need to know how their apps are behaving inside their containers. This capability is captured under the category of ‘observability’. To monitor container-based apps properly you need to have direct and deep visibility into the underlying container platform. Containers can crash and be rescheduled in seconds, often meaning failures could go unnoticed by end users, but this doesn’t mean there isn’t a problem.
Through its close integration with the underlying container platforms, Portainer is able to help users not only identify issues in the application deployment but also identify issues in the container platform itself and provide a live visualization of what’s running where and how.
Governance and Security
Orchestration platforms like Kubernetes are insecure by default, which is a problem for any organization looking to deploy K8s at any scale.
Portainer helps Platform Engineers secure their environments by allowing them to control who can do what, logging who does what and providing the ability to backup and restore the Portainer configuration database. RBAC and oAuth are cornerstones of the Governance framework. At its core, Portainer is a powerful policy and governance platform and an essential element in the IT stack.
Platform Management
The ability to set up, manage and configure a containerized environment is central to the Platform Engineer (or SREs) role.
Portainer Business’ platform management functionality allows engineers to both configure the orchestrator and then set up configuration ‘rules’ which define what users of the platform (typically developers) can and can’t do inside the environment
Getting Started
In this blog, I will show you how to setup Portainer on a linux environment , In this case I am using Amazon linux 2
Prerequisite:
- Amazon linux 2 Instance
- Docker
Setup:
Create a Docker volume by using the below command which is outside the scope of any container
docker volume create portainer_data 
Portainer it self is provided as a Docker image, all you have to do is start the container
docker run -d -p 9000:9000 --name portainer --restart always -v /var/run/docker.sock:/var/run/docker.sock -v portainer_data:/data portainer/portainer-ceNow you can look at the docker container running by the below command:
docker psThe above command starts the server at port 9000. You can access the admin page via http://localhost:9000 . You will be prompted to set up the admin account to sign into the portal.
In this case, Amazon Linux 2 will be used. You will get the public ip:9000. Soon you will be able to see the Dashboard as shown below
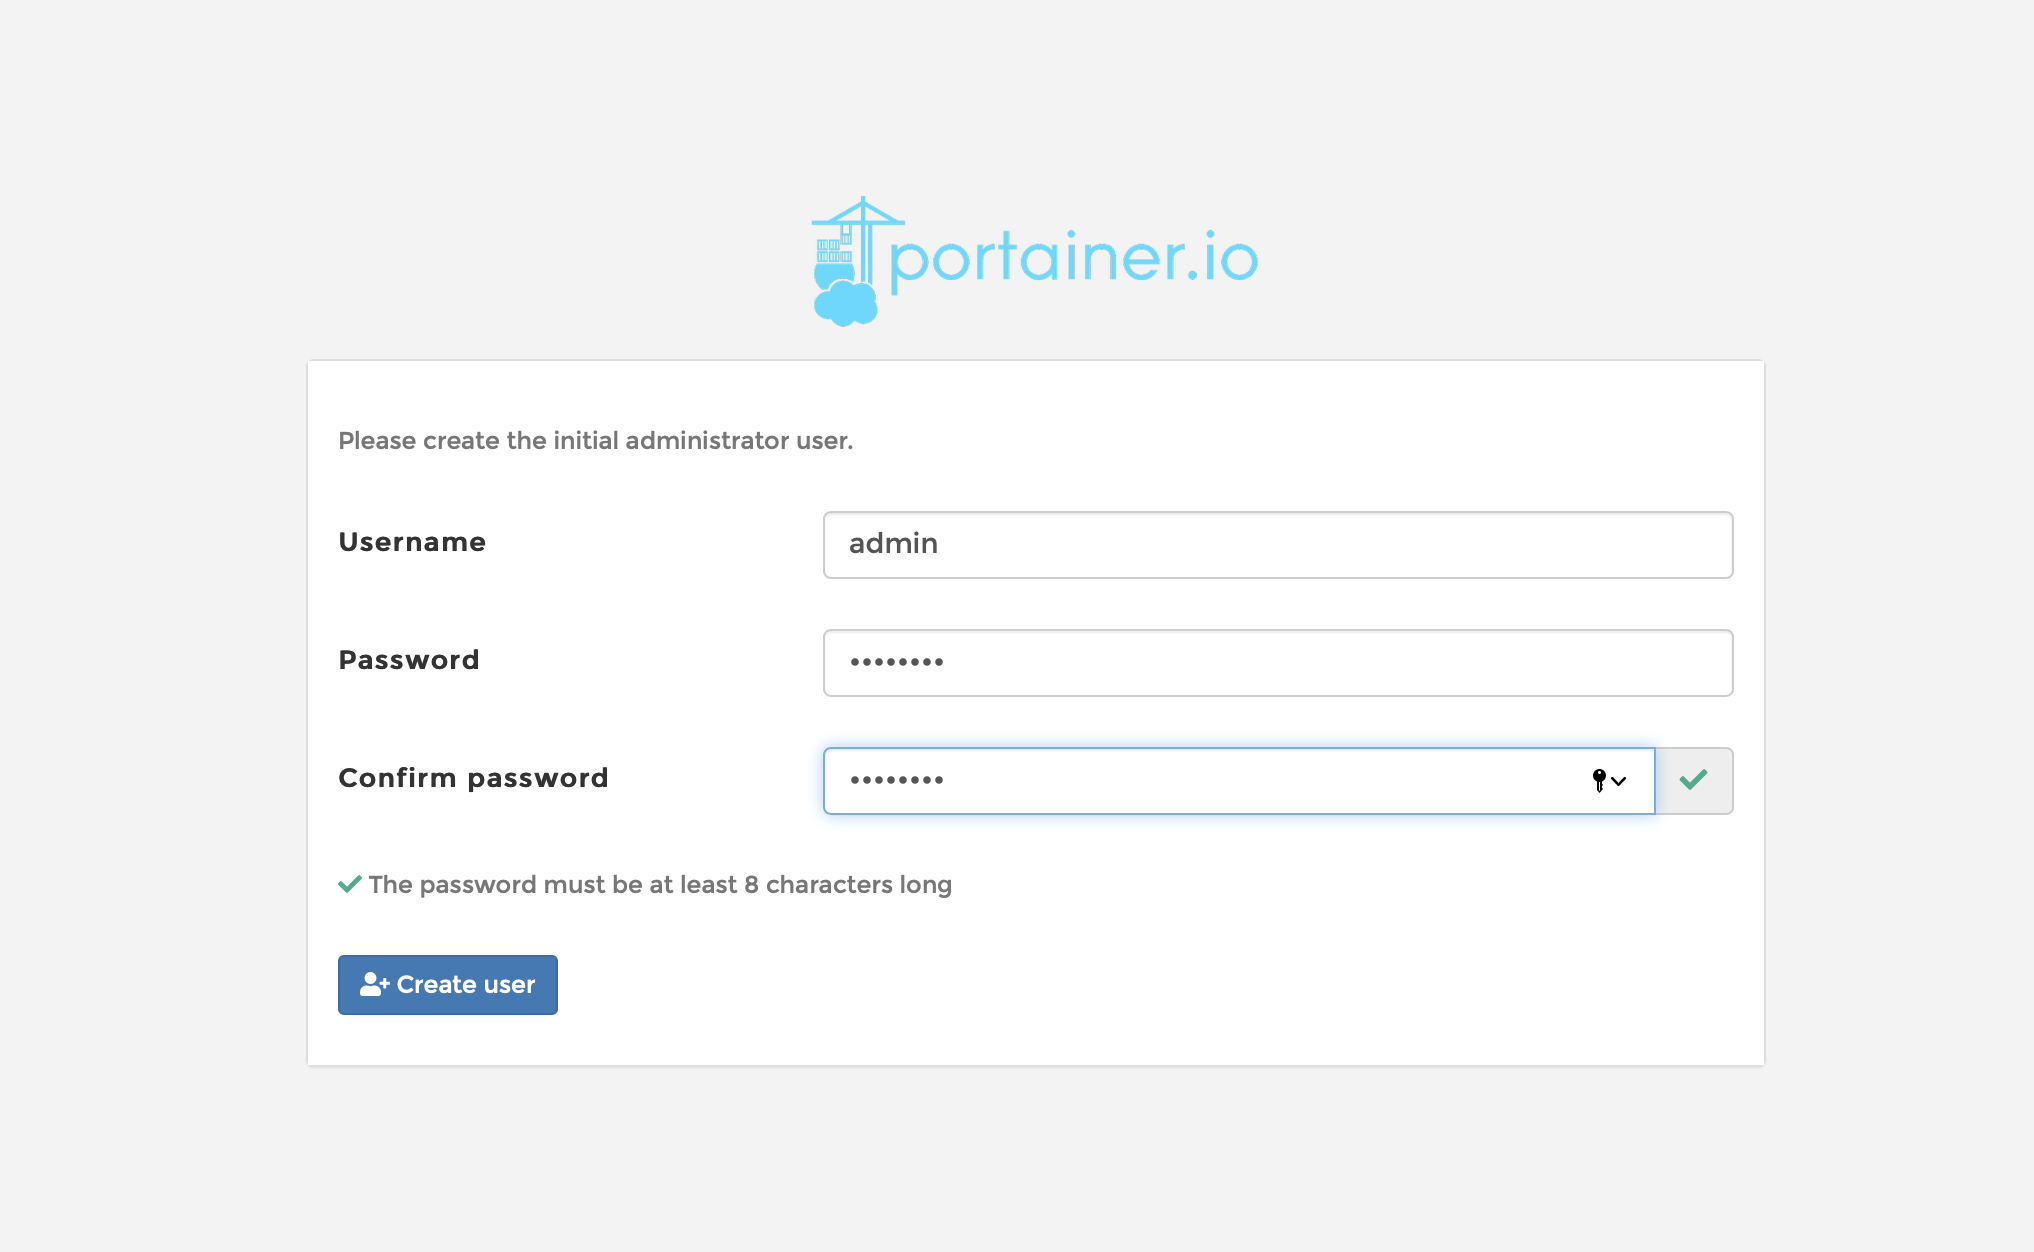
Now Enter the password and confirm password as your wish and click on create user, After clicking on user now we have four options to select (options might differ based on version available)
- Local
- Remote
- Agent
- Azure
- Local : Manage the Docker environment where Portainer is running.
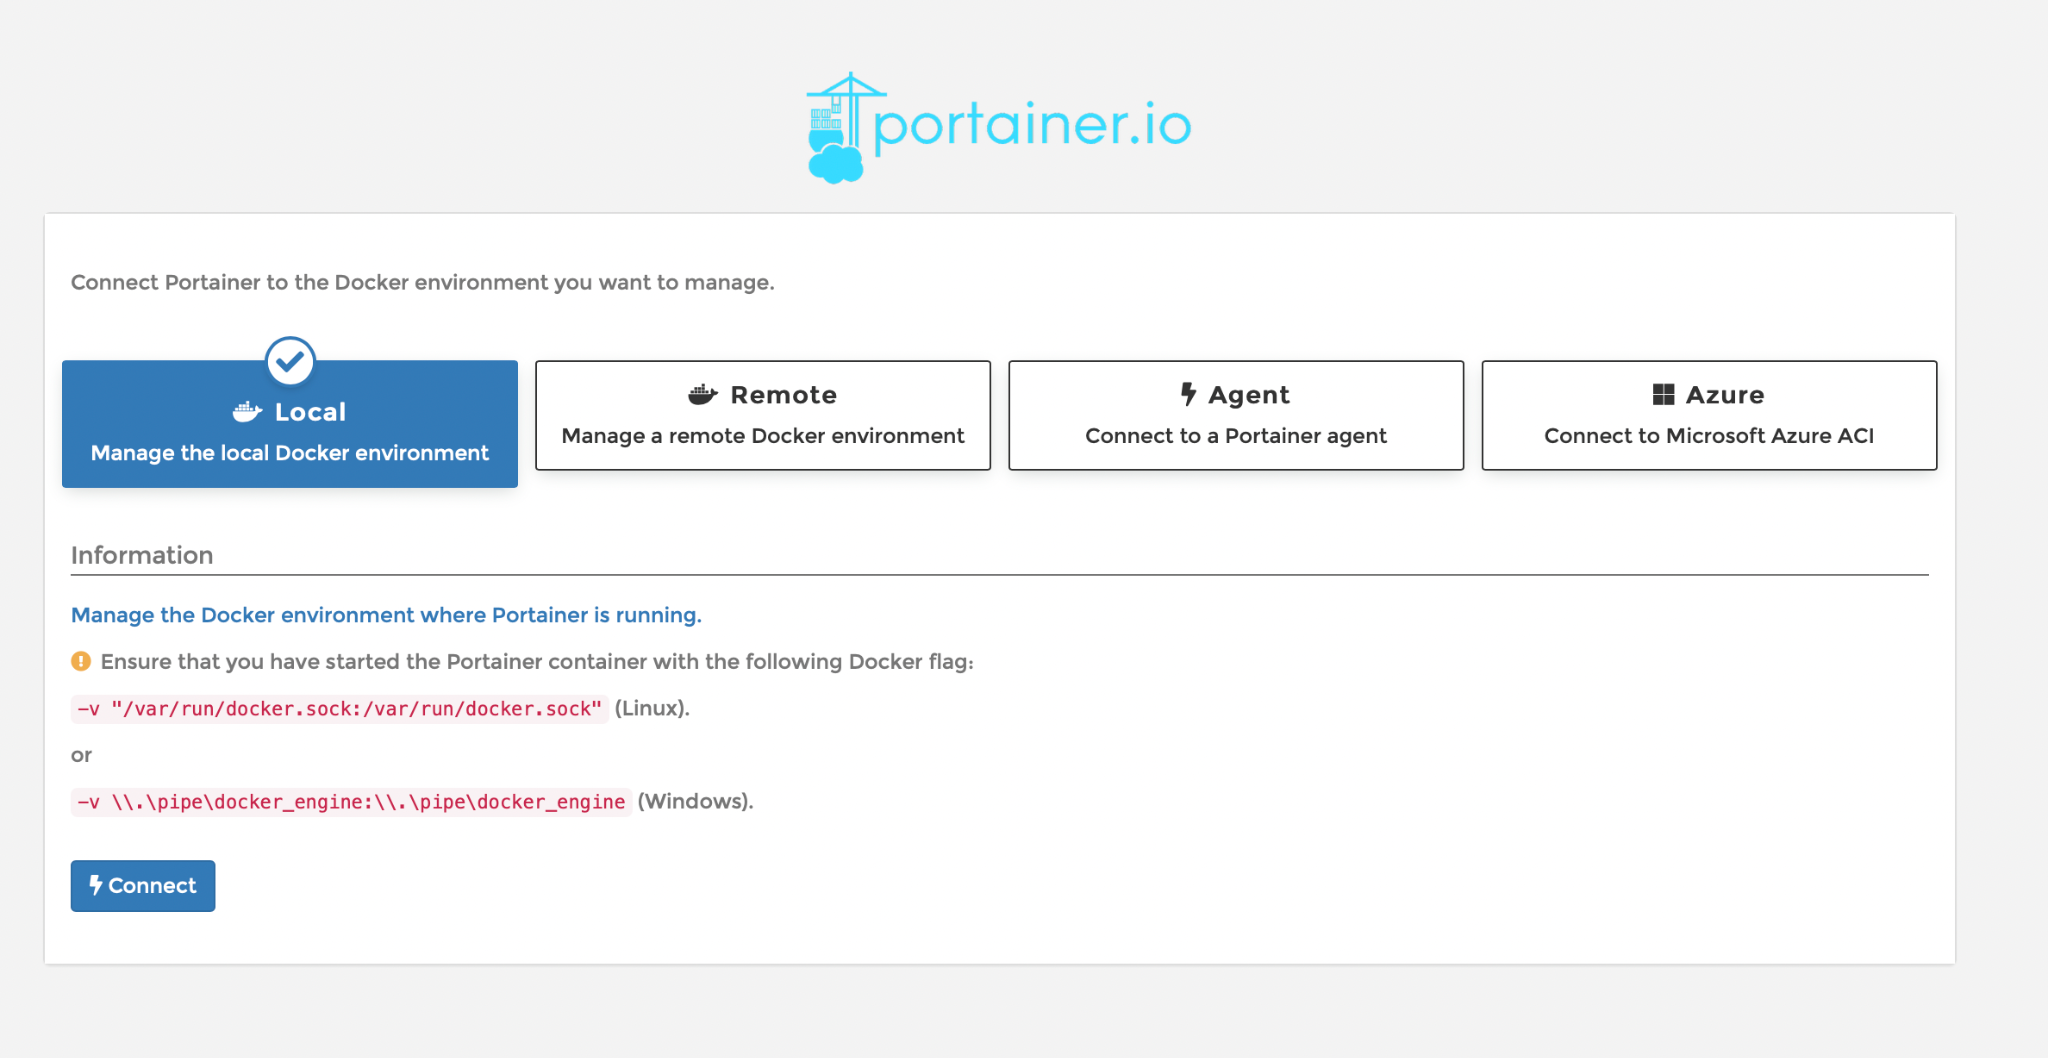
- Remote : Connect Portainer to a remote Docker environment using the Docker API over TCP.
- Agent: Connect directly to a Portainer agent running inside a Swarm cluster
- Azure : Connect to Microsoft Azure to manage Azure Container Instances (ACI).
Here In this case I am selecting Local for simplicity purpose , Now for simplicity we will be using Local , So Select the first one Local and click on Connect. Once Connected , you can see the Home page as below
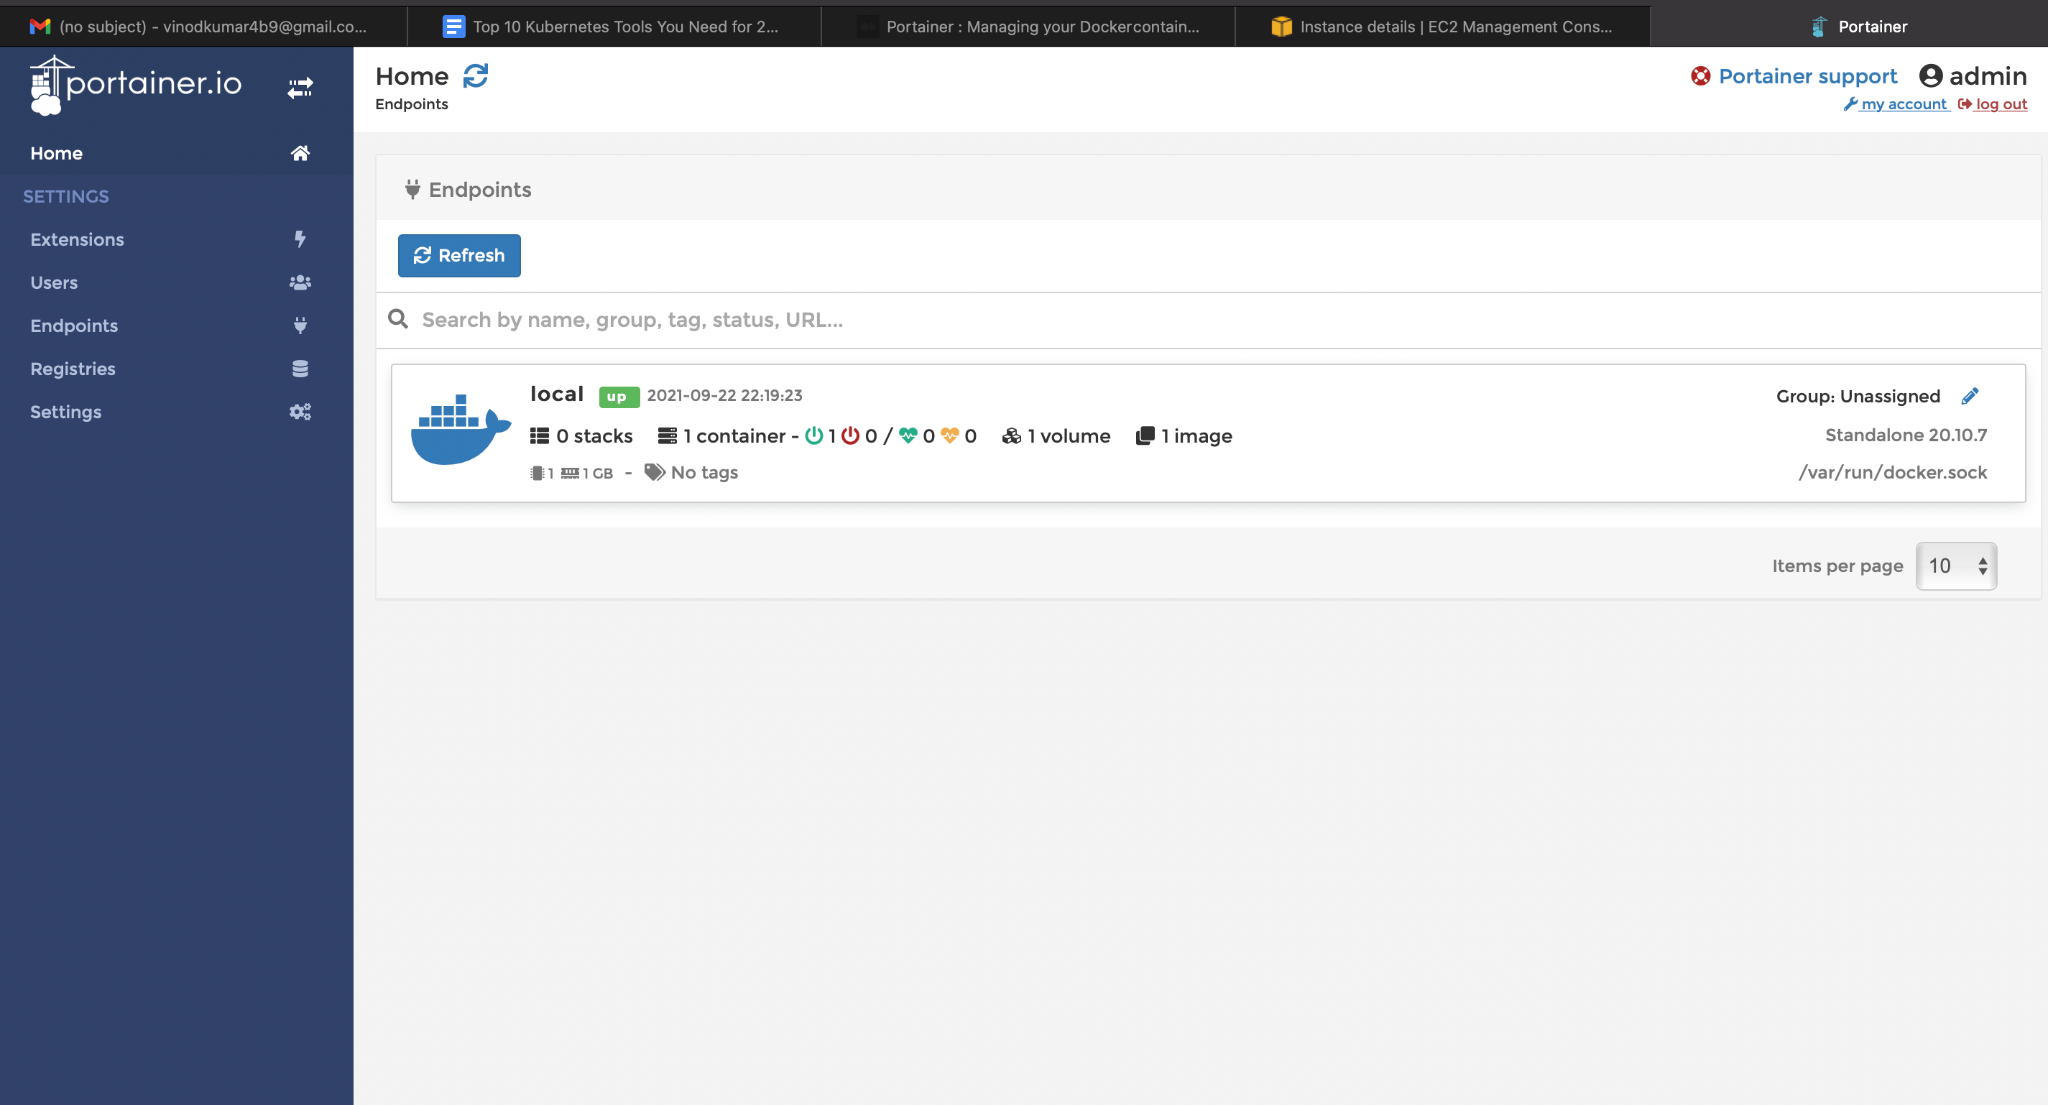
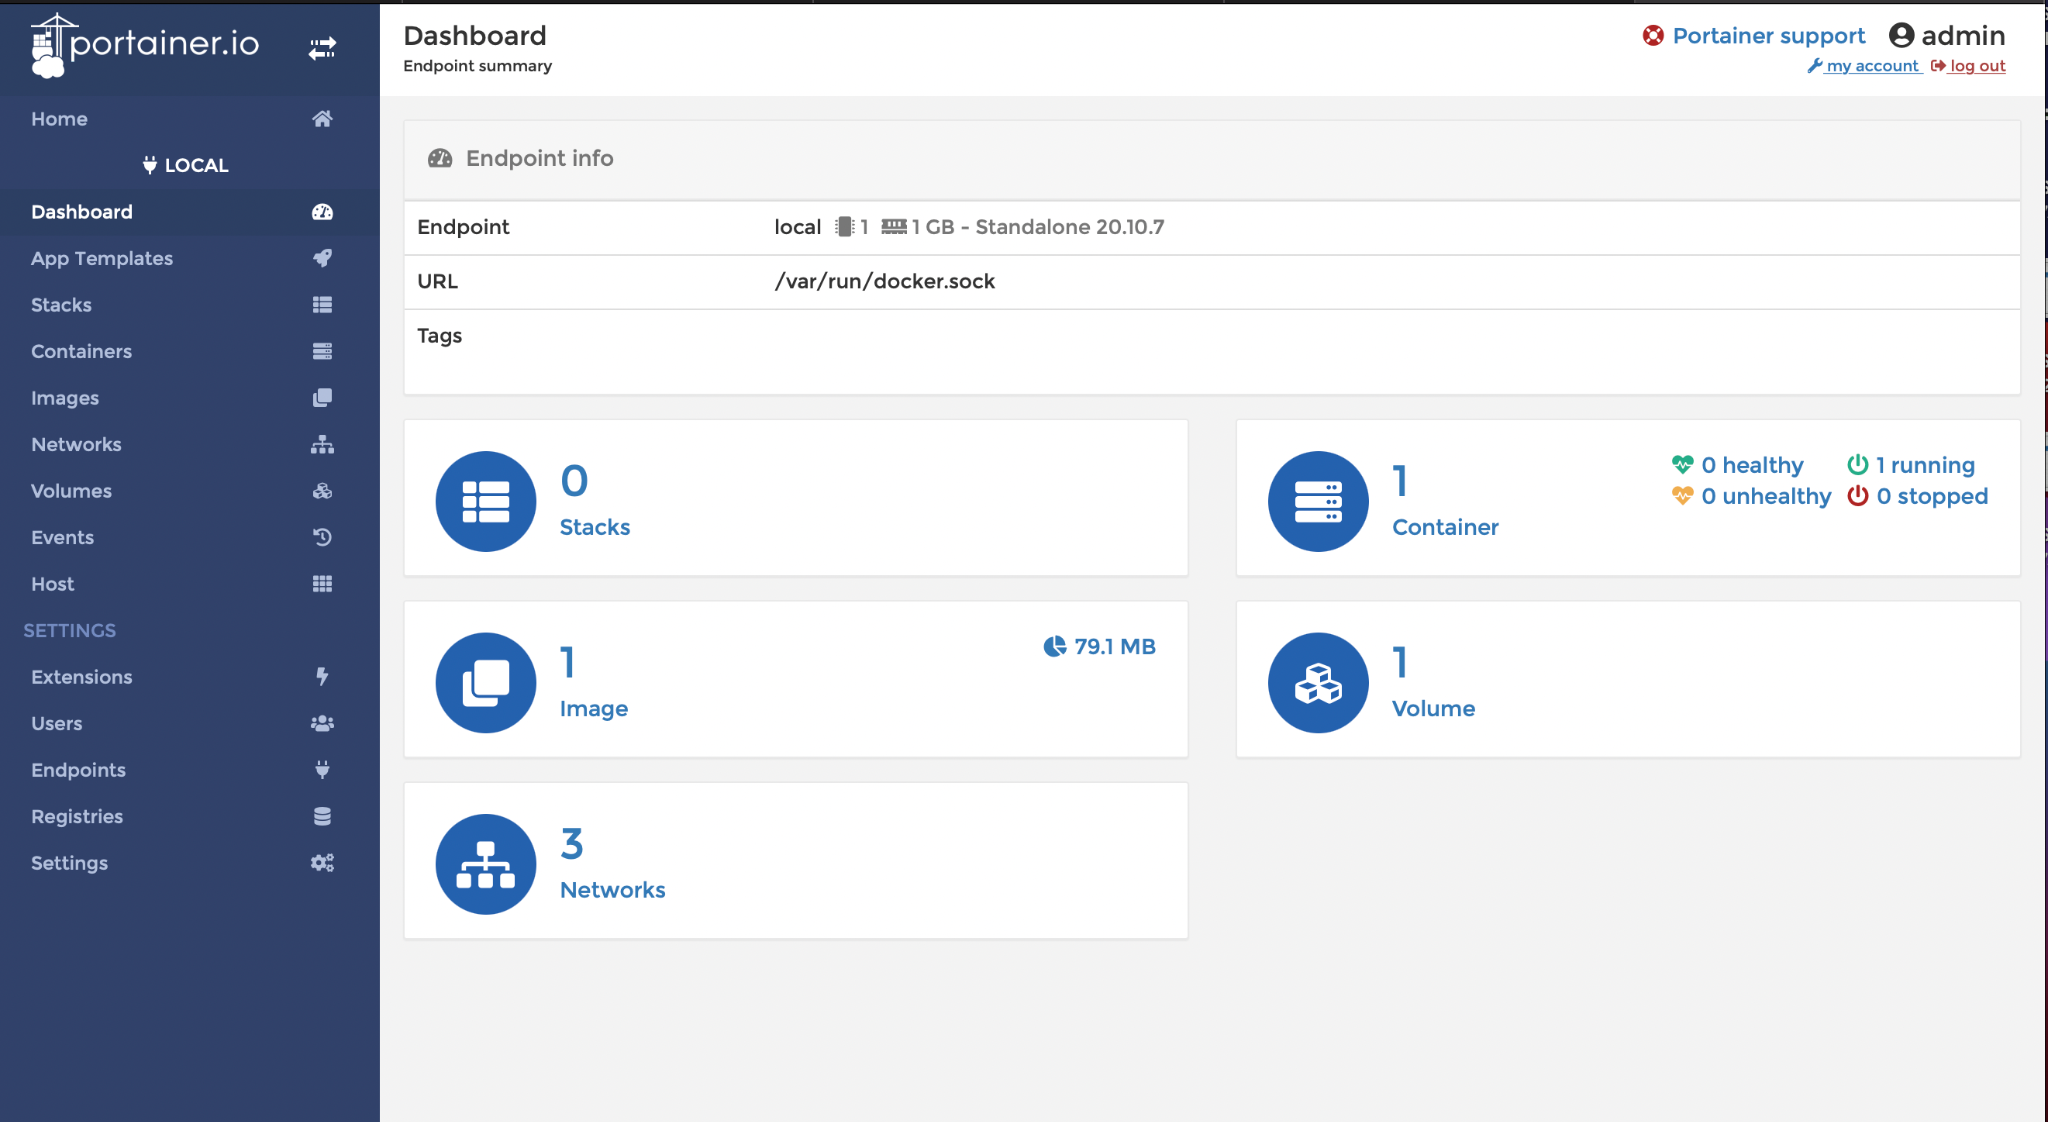
Now click on local above , it will give you full Dashboard for that Endpoint
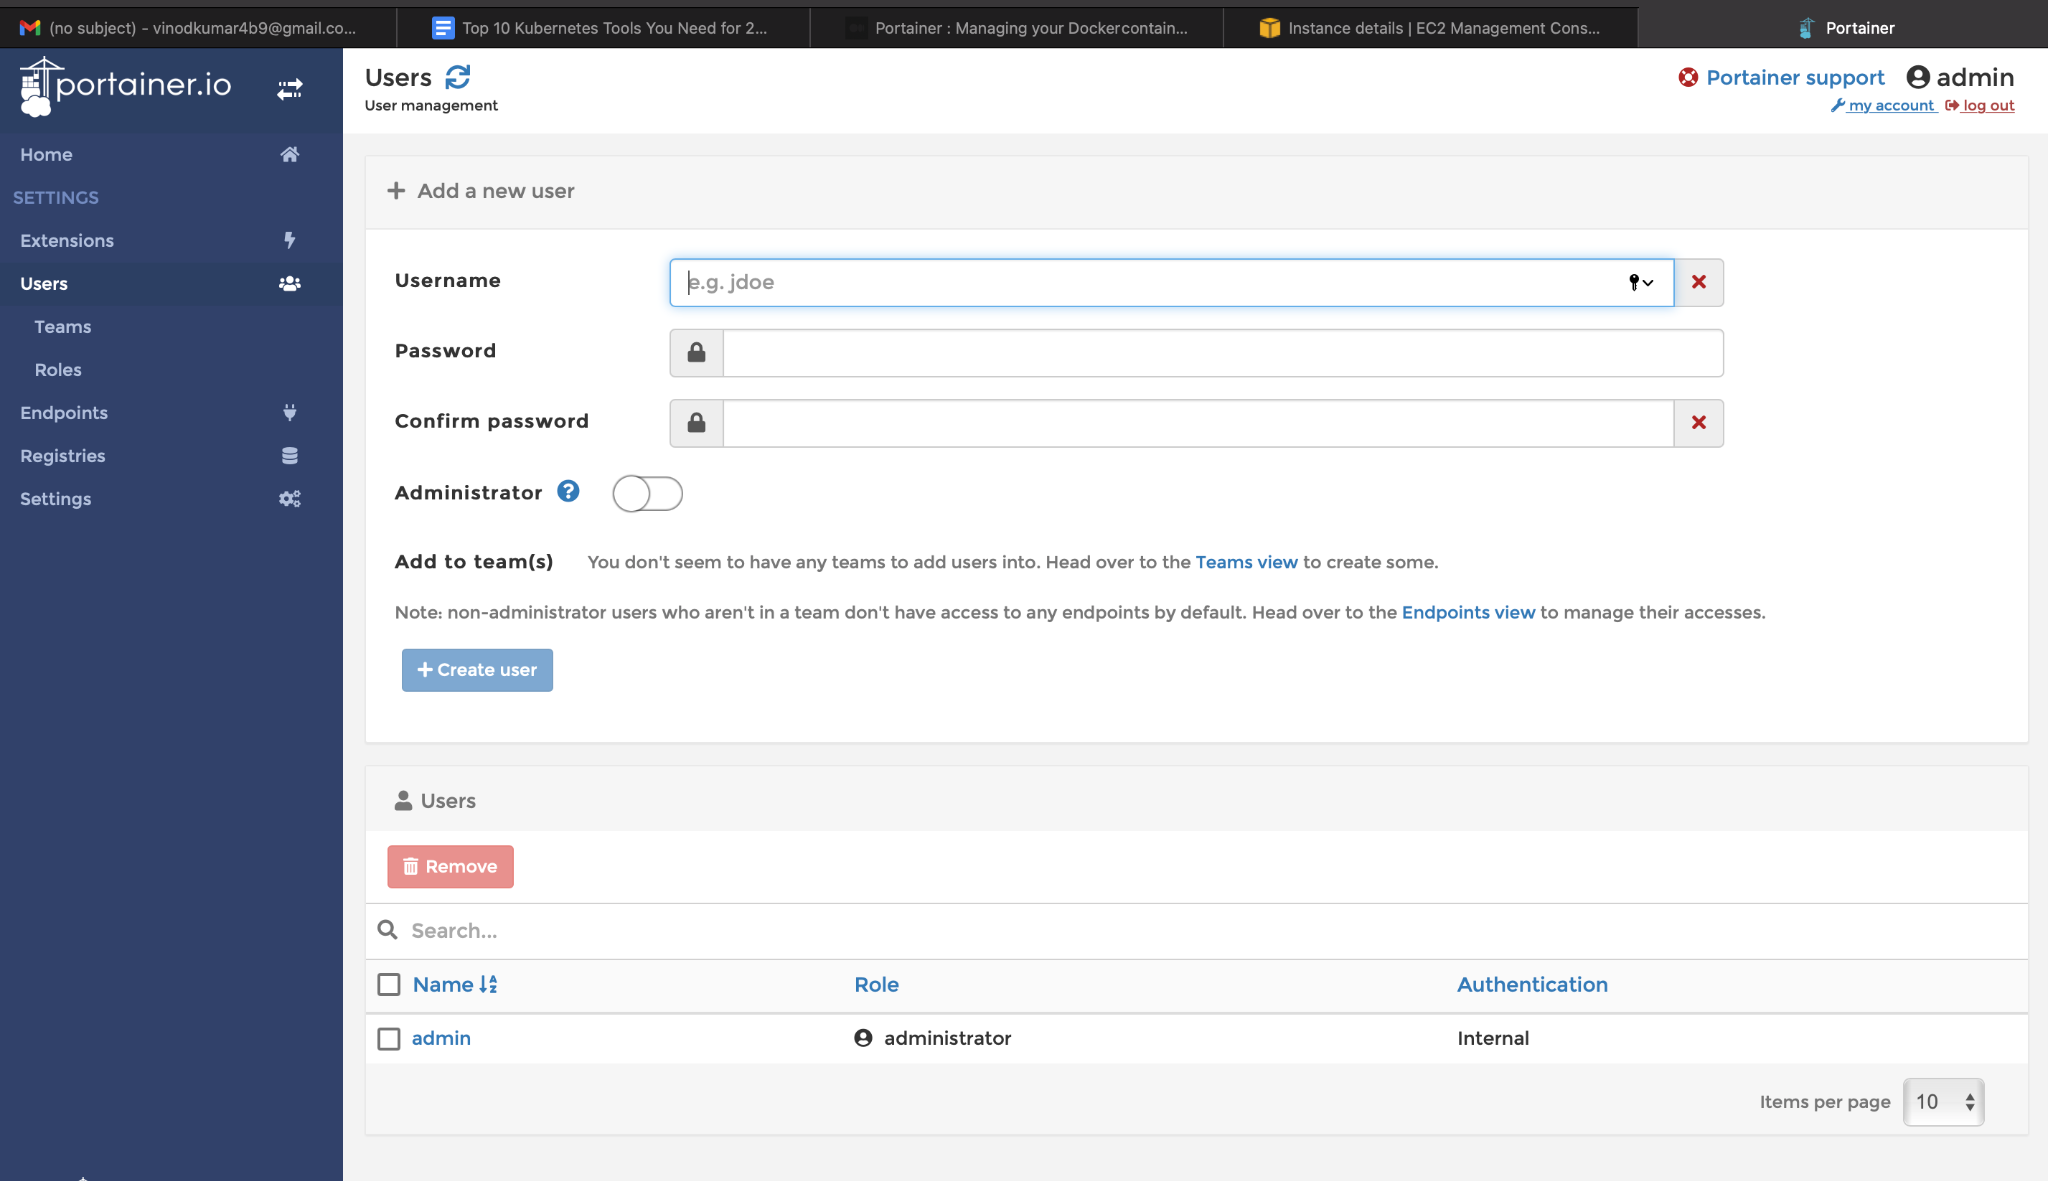
You Can even explore various options under settings like Extensions , Users, Endpoints and registries
Based on the version you use Endpoints might differ, To check the available options for Endpoints Click on Endpoints and click on Add Endpoint
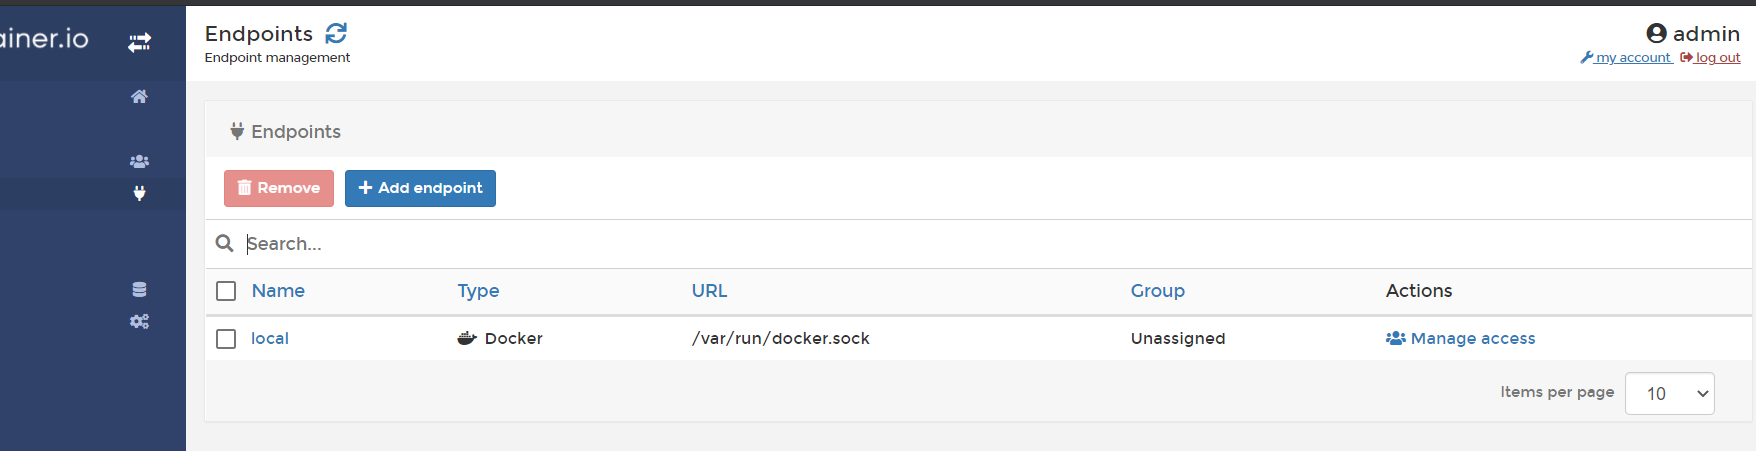
Now you have different options like Docker , Kubernetes and Edge agent where you can configure accordingly and this endpoint option will always vary based on the latest versions available at that point of time

Downloading images and creating containers
To get started to create images and containers , navigate to Images and choose an image of your choice to pull. If you have added your DockerHub account under Registries, this will be used to download the appropriate image
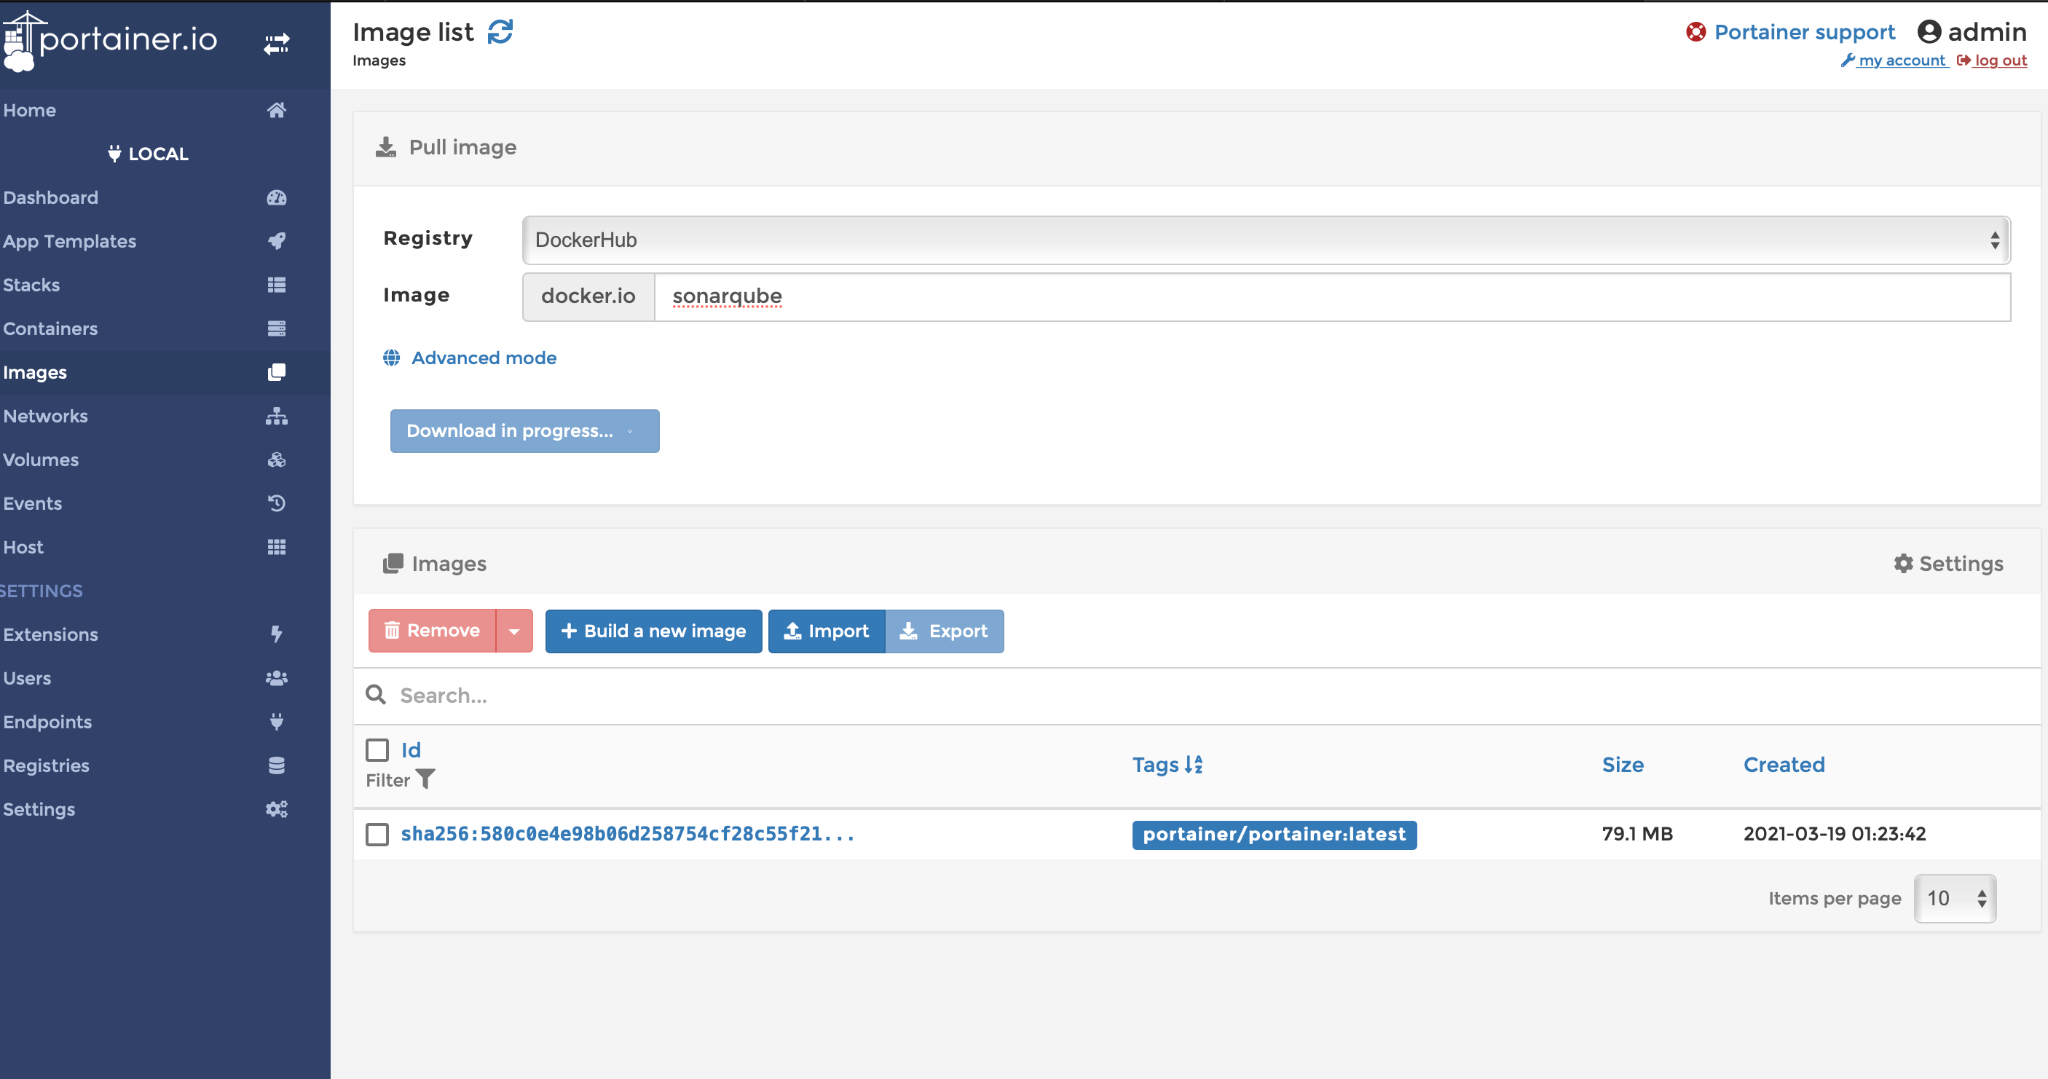

Now you can opt to start the container from command line or within the Portainer itself

Now Run the sonarqube container in the server by using the command

Once the container is running, access the portal to view the status of the newly created container (as per this example sonarqube)

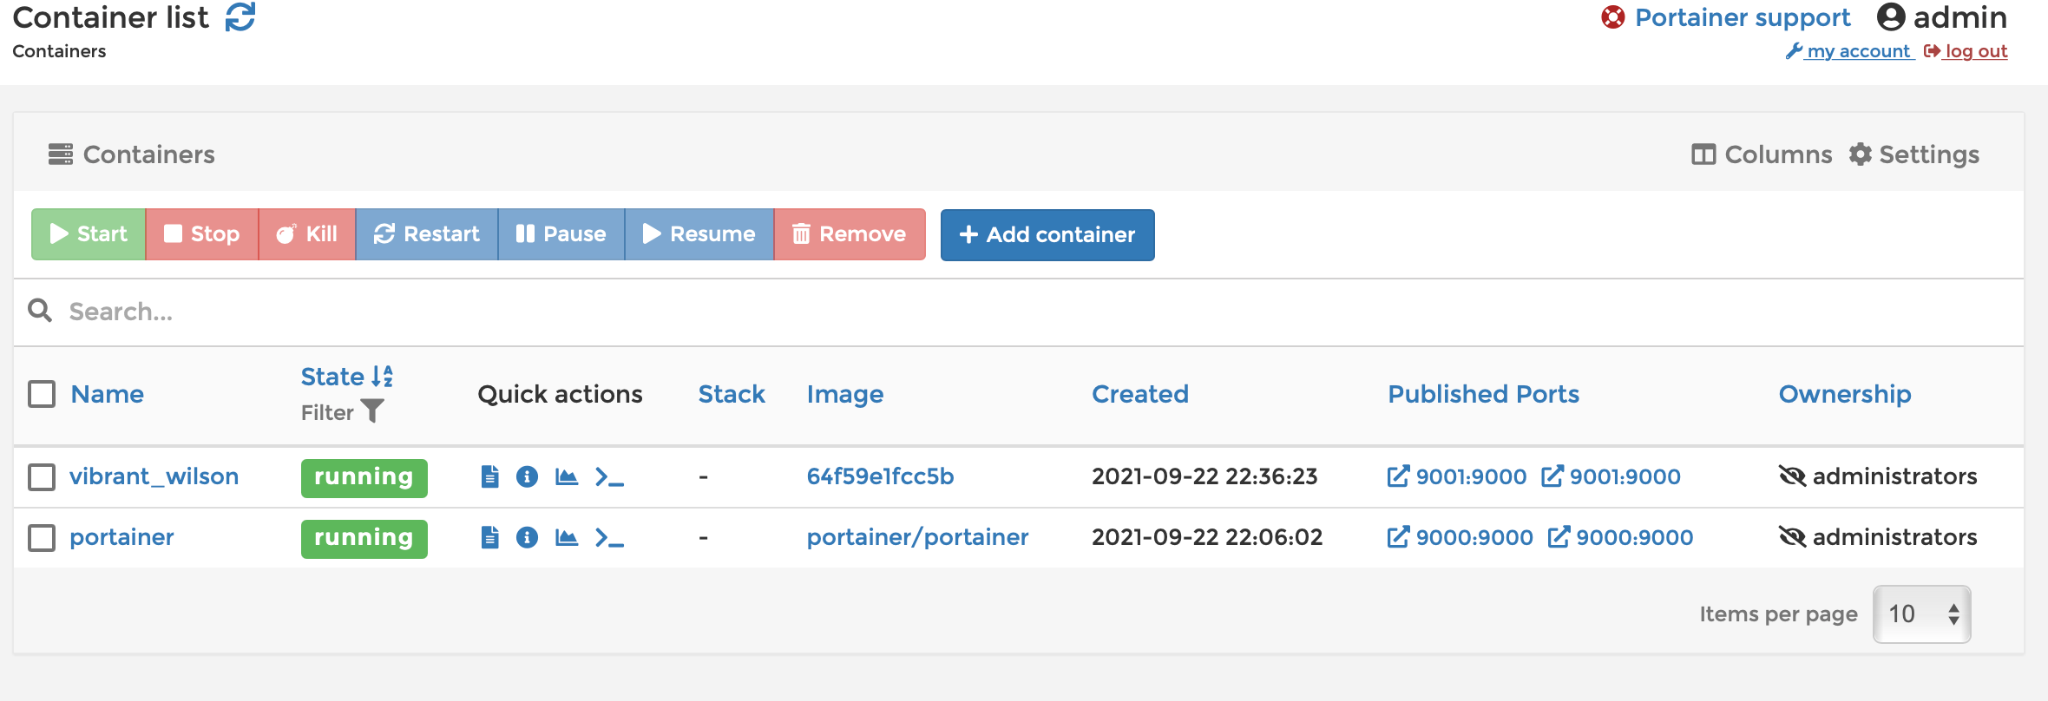
You can now click on new container in this case vibrant_wilson which is a sonarqube container to see more details
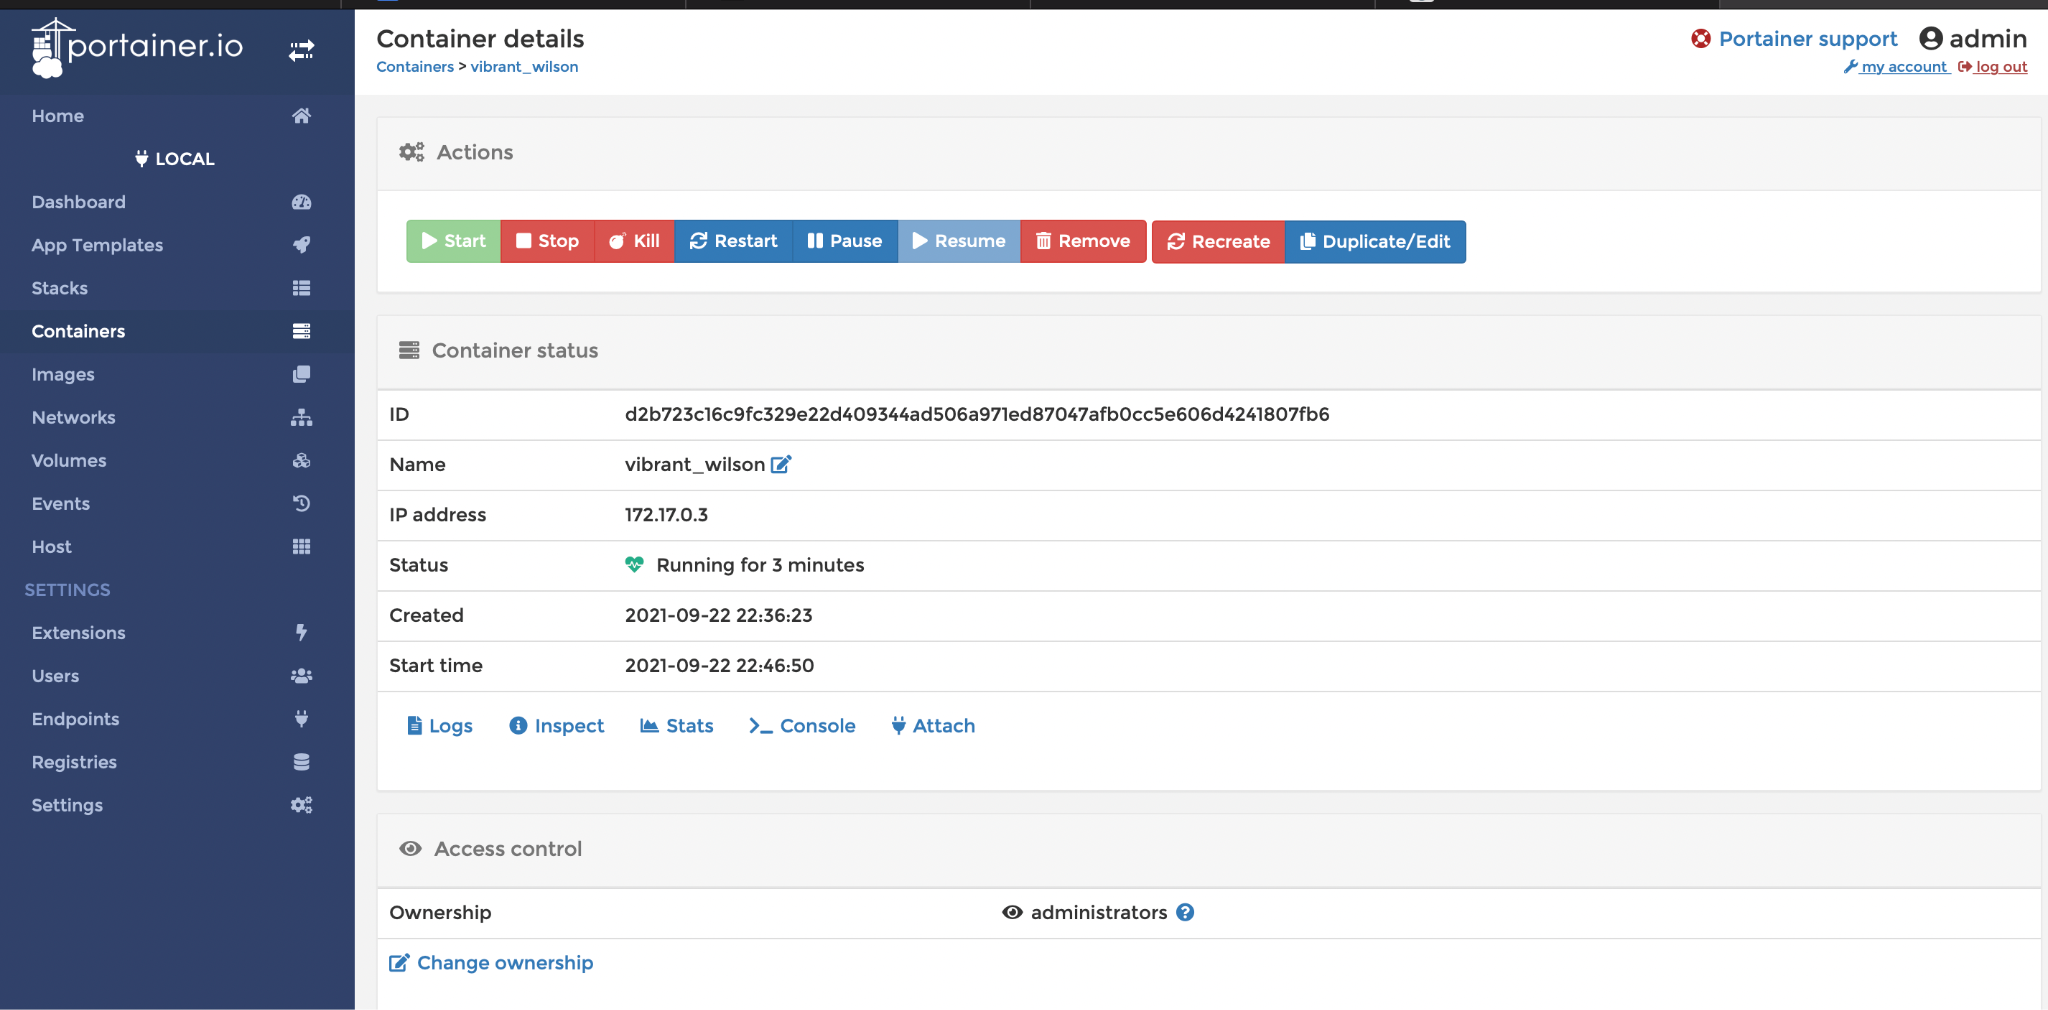
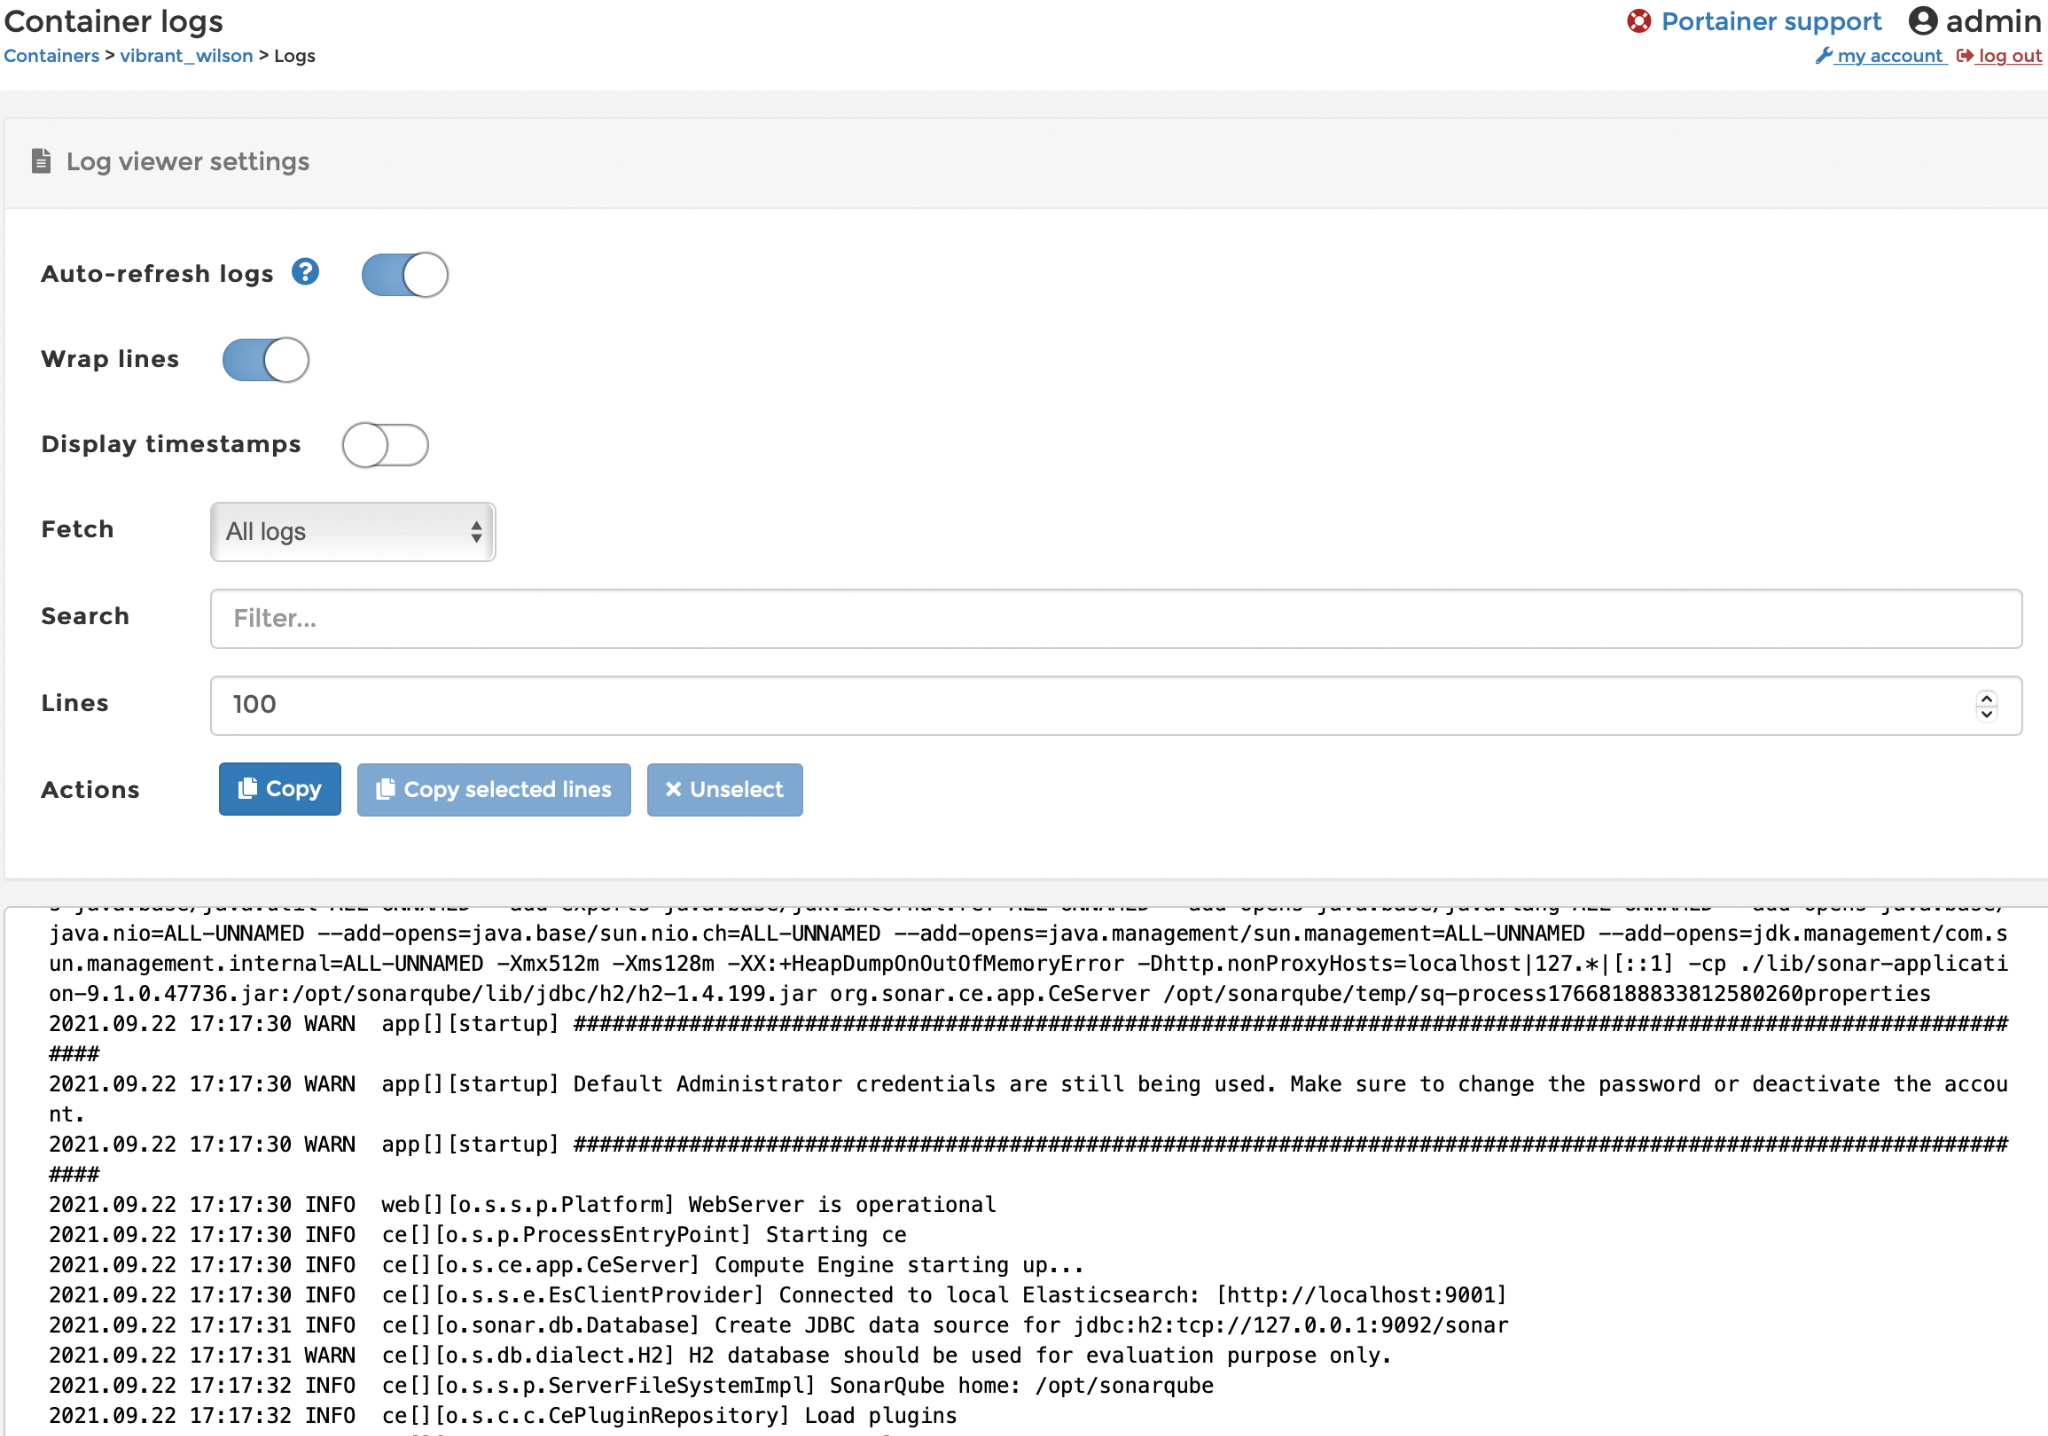
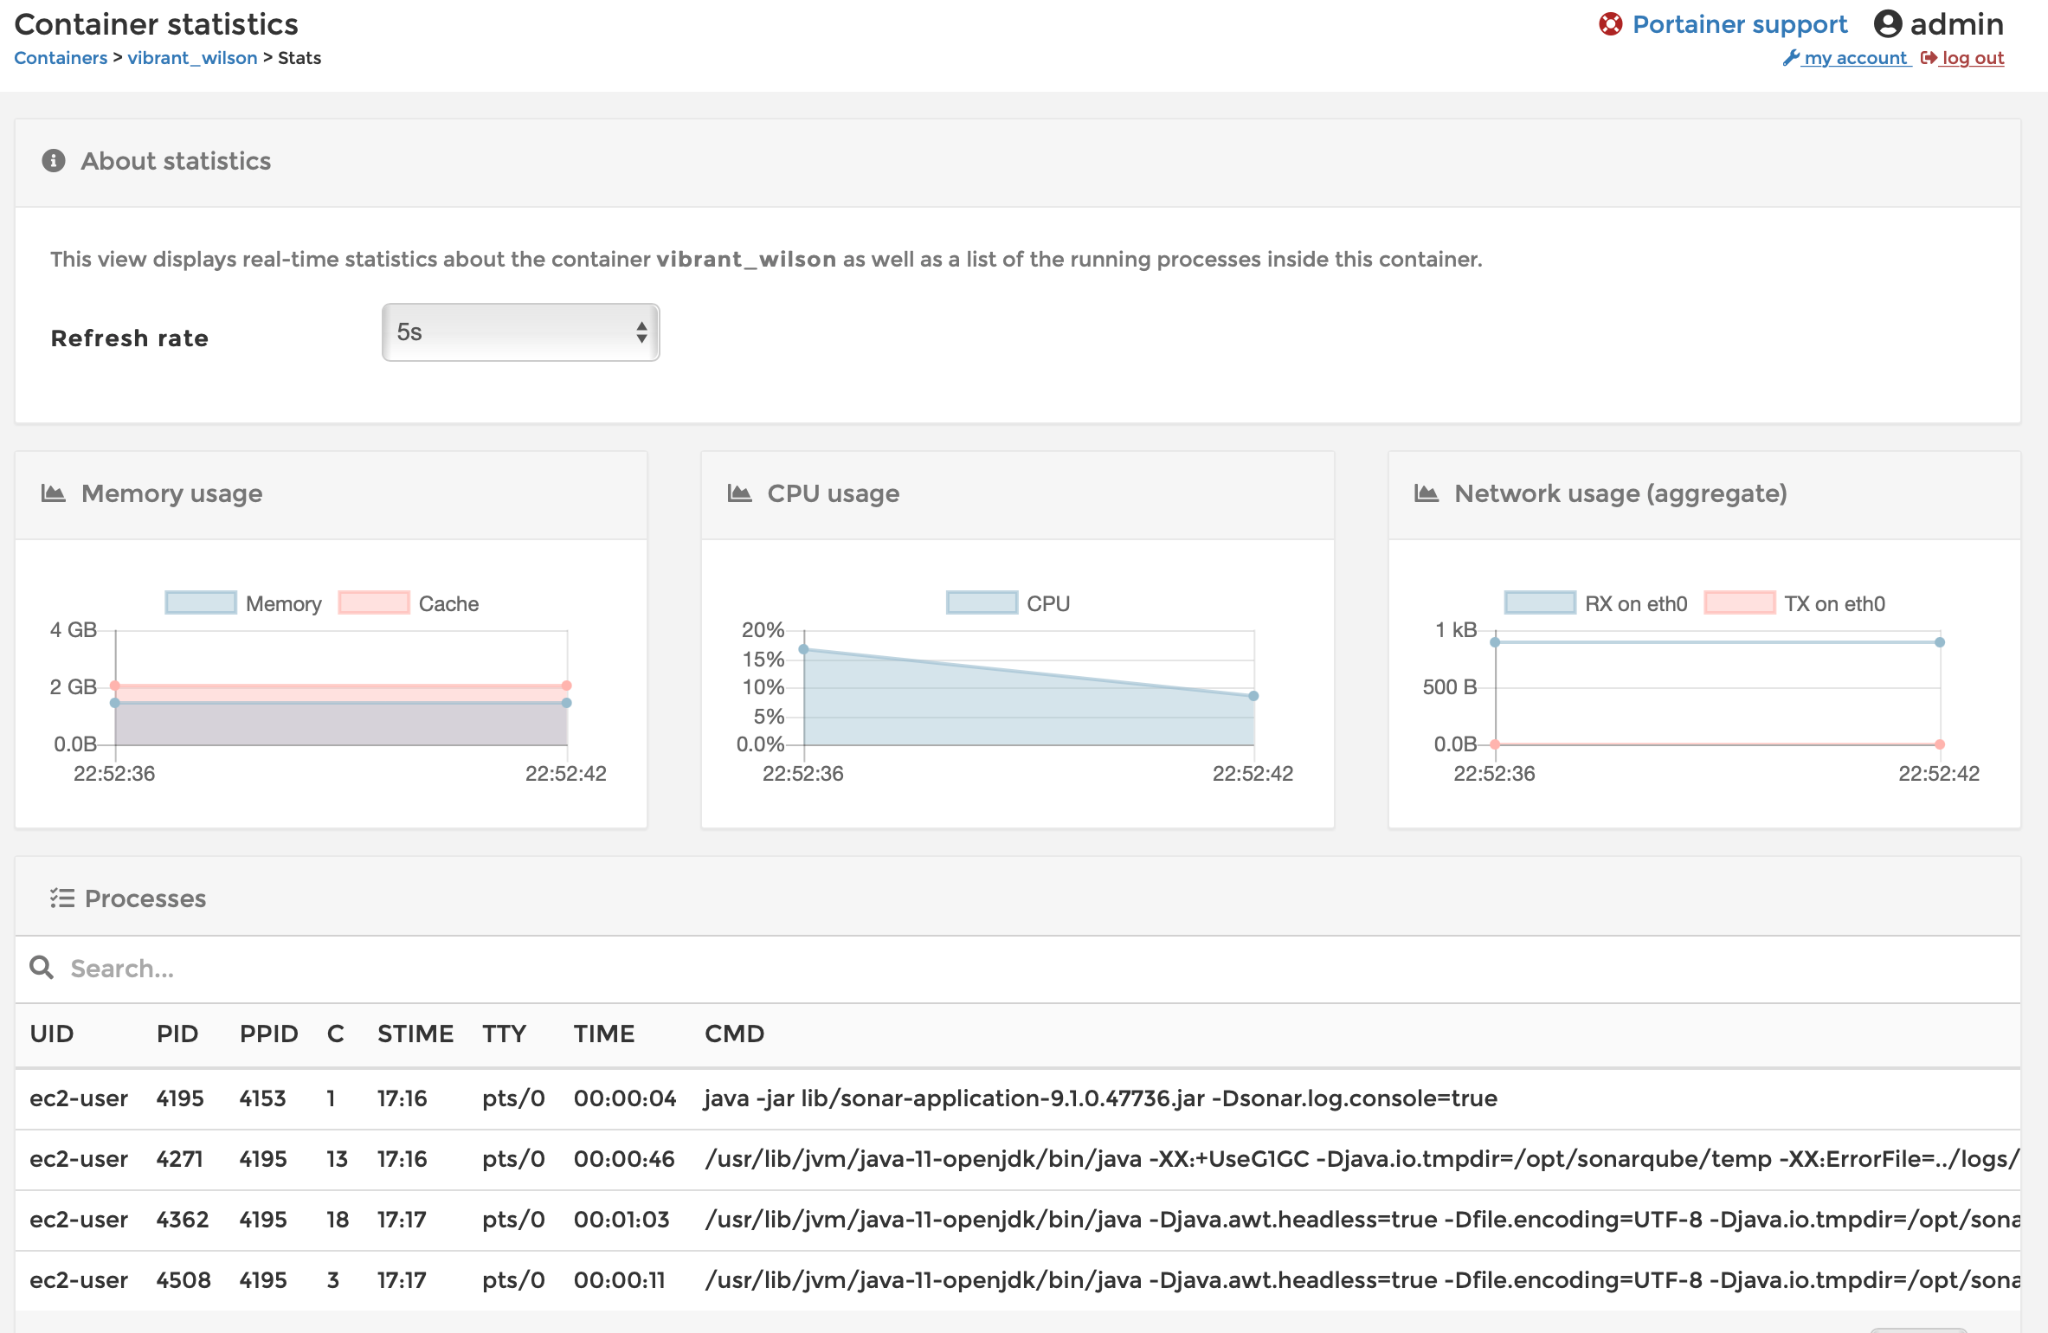
And click on stats and logs to see the details accordingly
From the Portainer console
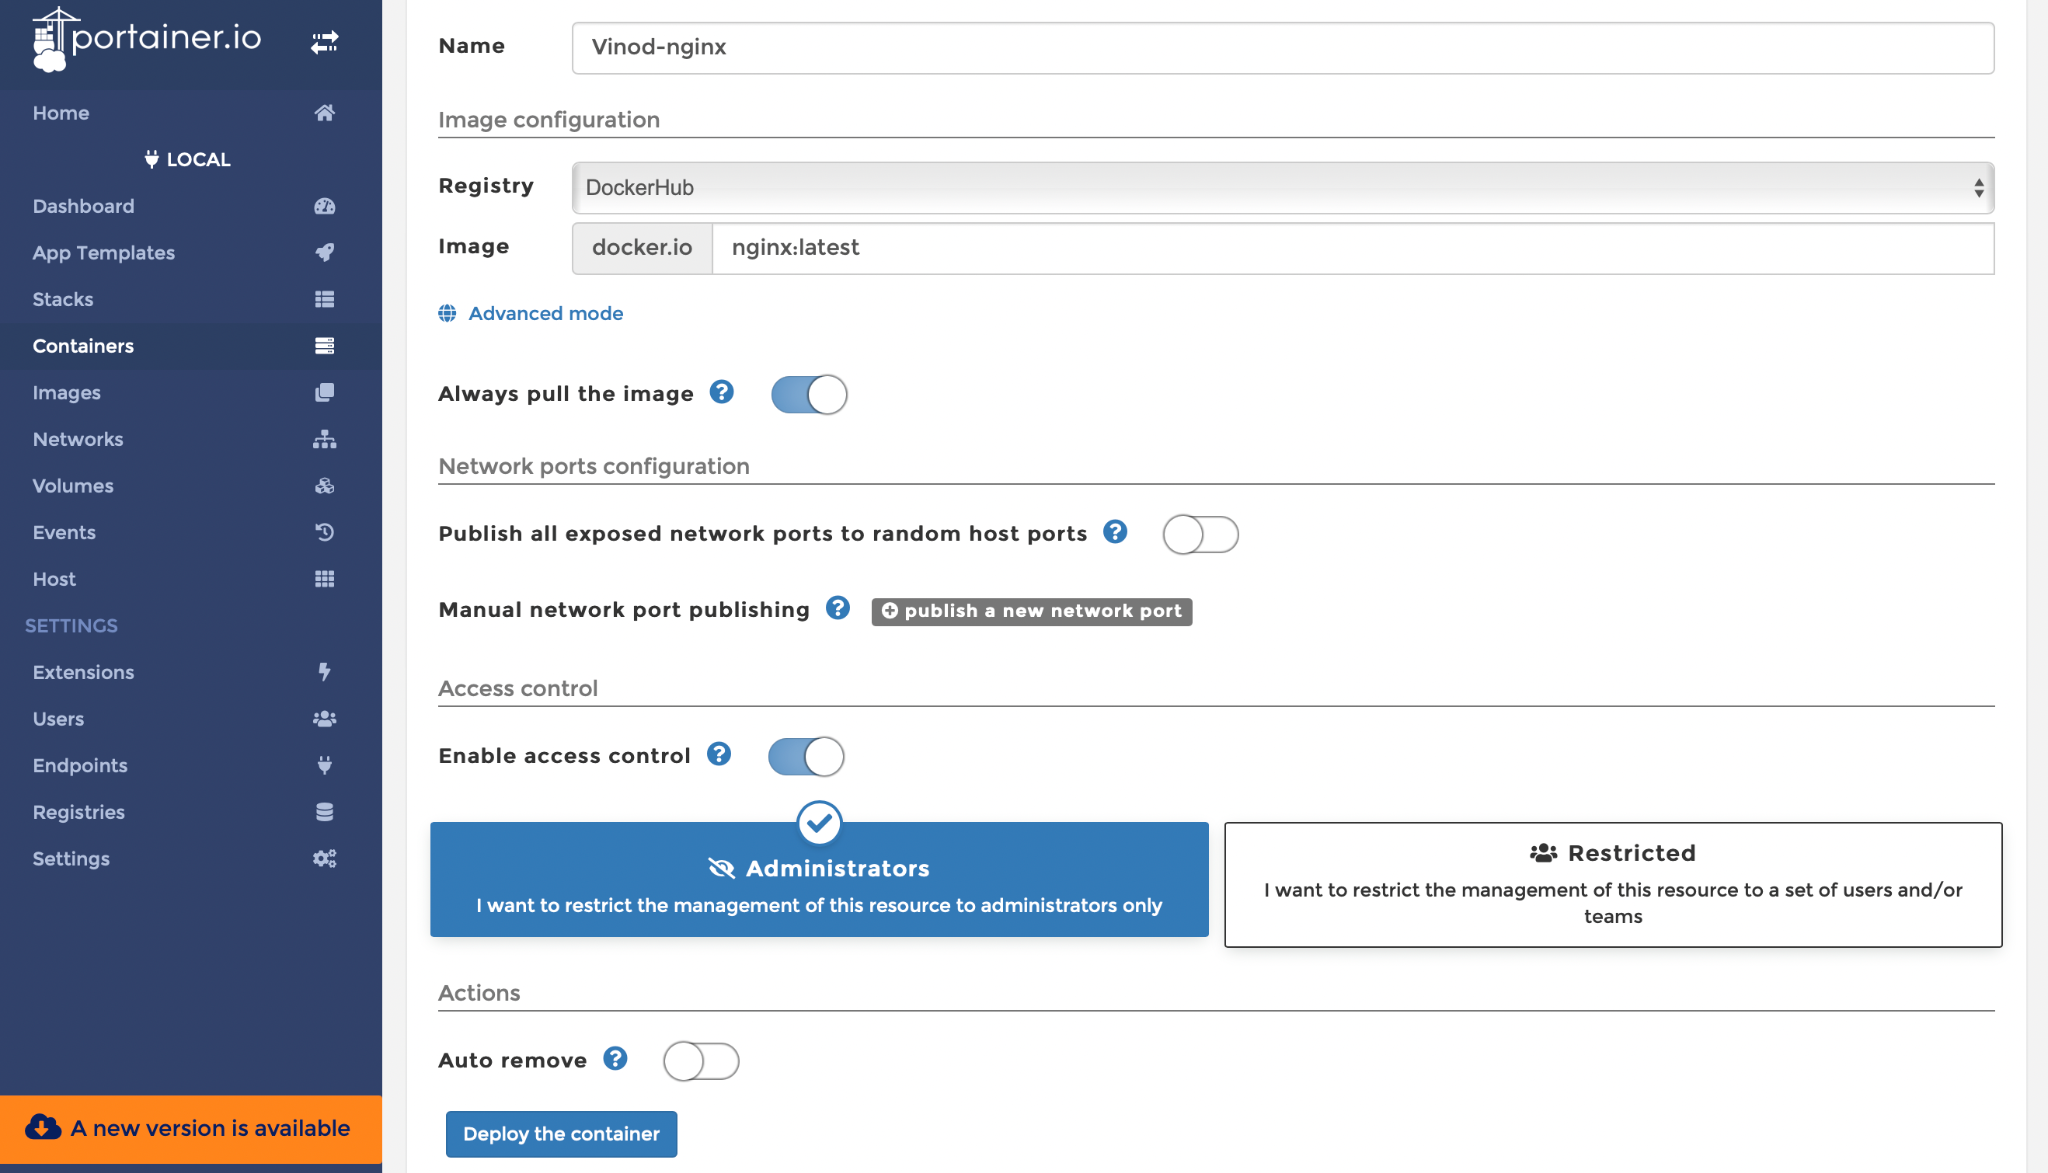
The console eases the steps to create a container from within the console. Navigate to Container > Add Container to pull the image from the registry and enable necessary advanced settings to create the container.
Çlick on container and click on Add container as shown below
Now you can see nginx container started automatically once it is deployed
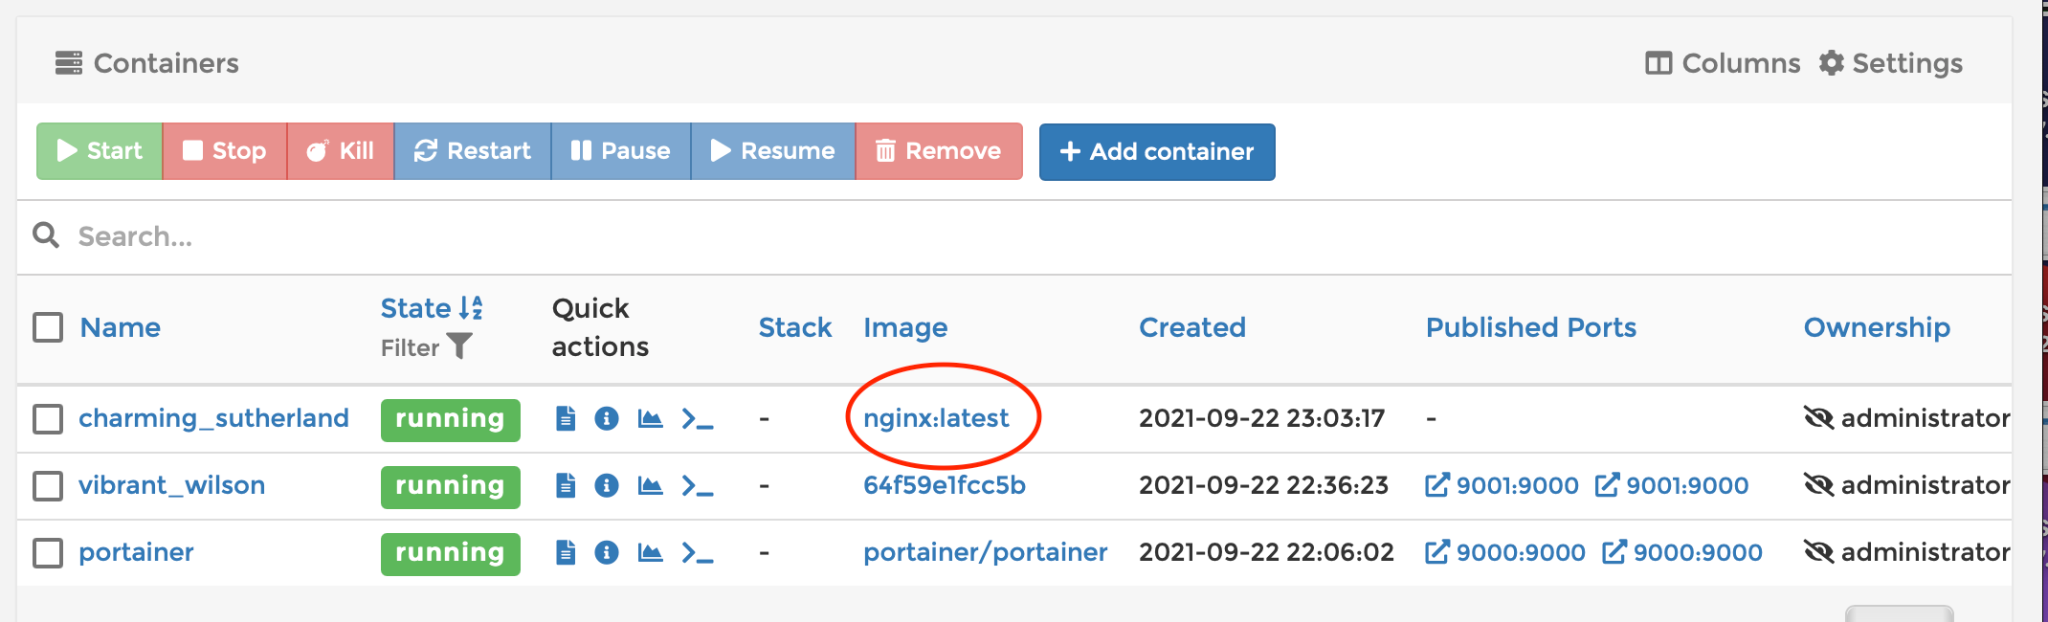
You can even verify the same in your linux instance

While there are more features than what meets the eye, this is all you need to get started with Portainer.
You can have a look at the below blog from our Docker captain Ajeet Raina on how to setup portainer using HELM charts and additional features
In the next blog post, we will discuss about Devtron ~ An Open Source alternative to Heroku. Stay tuned !
Comments are closed.